[et_pb_section admin_label=”section”]
[et_pb_row admin_label=”row”]
[et_pb_column type=”4_4″][et_pb_text admin_label=”Text”]
Introduction
When it comes to building your own home, you may have no idea where to start. Most of us don’t think about the exact process that is used to construct the houses around us, which can make the prospect of building one very daunting.

In this guide, we have detailed the process of building your own home from the first step to the last. For most people, and most buildings, you’re going to need some help. Whether it’s professional contractors or a few of your friends that know what they’re doing, you’ll need a team if you plan on building an entire house capable of housing multiple people.
Don’t worry, we have the entire process outlined below. We have also included links to supporting material that gives you more information about certain construction principles and techniques. No house is exactly the same, after all, so you may need to do some extra reading to realize your dream home!
Let’s start at the beginning with the things that everybody should consider.
Things To Consider Before You Start

Nobody wants to be halfway through a construction project before realizing it’s not a feasible build. You need to think a lot about your project before you even start. If you’re here, you’ve probably already given the build some thought. That’s great!
If not, then don’t worry. We have the three main things that disrupt and delay construction projects detailed below. Such delays can be costly, so you must have everything figured out beforehand so your build can be faster and more affordable.
Plans And Permits
First, paperwork. It’s not the most exciting thing, sure, but it is essential for building in any modern country on the planet. You’ll need to get permission before you start building, otherwise, the local authorities can and will tear the place down. If you own the land, you should still check if permission or an alert for the local government is required – it’s not always clear and differs between jurisdictions.
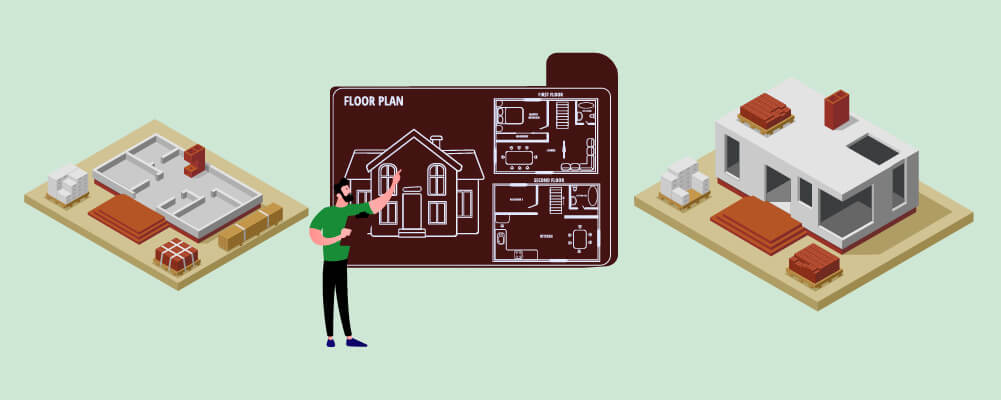
Through the process of gaining planning permission and building permits, you’ll also need to formalize your designs. This means you’ll settle on a blueprint for the home and won’t change it once the project has started (or you’ll need to notify and get permission for any changes/extensions that may be added).
So, you’ll need to have the design of your home figured out, too. This means knowing how many floors the home has and how many rooms are in each one, along with important maintenance information such as ventilation and those other unseen components that make our modern homes comfortable to live in.
These designs are best drafted up by a professional, of course. You’ll also need to show how the home will look from the outside, something that an architect does, though you’ll need to contract and pay them if you don’t have the skills yourself.
If you haven’t already figured it out – this can be a long process. Fortunately, houses are smaller than larger buildings that take even longer to plan and get permission for. On the flip side, your local authorities may process larger projects faster, because they’re more lucrative to the community. As an individual who just wants to build their home, you may get pushed back while bigger, more important permissions are granted. This all depends on how your locale is governed, of course.
Understanding Your Budget
Along with knowing what you’re going to build, you should also know how much it’s going to cost. Once again, the specifics will vary depending on your available funds, the nature of your project, and where you are in the world, country, and even state.
If you’re working with contractors, you should be able to get a quote after finalizing your project plans and letting them take a look. You’ll also need to pay for the materials that are being used, which will take up a significant portion of your budget, along with paying any specialists that are working with you to make the building.
Remember that contractors speed up the building process. Companies like G.H. Clark can take care of the physical creation of the whole building or just single aspects. Having a professional take on important structural roles can save you a lot of money in the long run, as they can secure your structural integrity.
Self-builds can be the cheapest or most expensive projects to attempt, depending on how you handle the budget and how fast and effective you can get the job done. Labor and material costs don’t come cheap, so you’ll want to be careful with how you handle the money.
Like with most budgets, it’s a good idea to retain anywhere from 10% to 20% more than you think you’ll need. That way, you have backup funding for unexpected issues, and you won’t run out of money halfway through the build.
Funds should be sourced from your savings, money from the sale of a previous home if you’re building a new one because you recently sold, or from secured funding elsewhere. That usually means taking out some kind of loan, which will need to be paid back with interest later.
If you haven’t got the funds right now, a loan can be great. That said, it can be dangerous if you’re financially irresponsible and have other types of debt weighing down on you. It’s also risky to borrow money from family and friends – you need to have a very strong relationship to withstand lending money to one another, especially if you may struggle to pay it back.
Needless to say, if you do opt for third-party funding, you need to have a solid plan first that you’ll follow to the letter. These ensure that the project gets completed fast and the loan is paid back on time.
Many establishments offer self-build mortgages for those who are making their own home out of thin air. These mortgages are handed down by banks and finance all or part of the build, to be paid back at a later date. You’ll usually need to front 25% of the entire project cost to the lender, though you may be able to find exceptions to this rule.
They’ll also give you the money in doses, at each major step of the construction process. This ensures you don’t take the money and spend it all on the foundations.
While self-build mortgages are better and more trustworthy than taking out a random loan, you need to be reliable and meet your mortgage payments. You’ll also need to agree on a plan of action with your provider and, once they consent, you can’t divert from it or you risk losing your funding.
Spacing
You’ll have some idea of how your project will be spaced through the planning and permitting process, though you should give this a lot of thought. A project that starts and then stops because of improper spacing planning will cost a lot more due to delays, especially if you’re hiring contractors or renting equipment. Also, time is money anyway, if not more valuable.
Contractors may also charge based on a set price per square foot, so knowing all of the relevant numbers is important. You can measure square footage by staking out the grounds of your home and then measuring it, then measuring it again to make sure your first measurements are correct.
You don’t just need to know if the patio will fit behind the home, you need to make sure everything is properly spaced inside the house too. The rooms should be proportionate and you don’t want a bathroom three times the size of the living room.
For fixtures, make sure that they are appropriately placed in certain rooms. If you have a fireplace, for example, you don’t want it to be off-center and in the way of anything else in the room.
Setting Up Foundations

To start, you’ll need to set up the foundations. Where else would you start? You could start with some minor landscaping if you own the land and want to make some small changes but, for the house itself, you need to start from the bottom.
There’s a formula for setting up foundations, outlined in the three subsections below.
Before throwing concrete down on the ground, you need to make sure some preliminary steps are taken so that the foundation of your foundation isn’t compromised. First, the site of the foundation needs to be leveled. Crews often do this using bulldozers, backhoes, or some other equipment out of the average person’s reach. You can also rent the equipment if you know how to use it.
Concrete
When laying foundations, you need to prepare the ground before introducing concrete to it. As we said, you need to level it, along with clearing any debris that may become a problem.
You also need to stake the ground to make sure you know where the footprint of your home is. This guides where you need to dig and makes sure your footing and foundations aren’t off.
To stop the home from sinking further into the ground, footings made from either concrete and rebar or brickwork need to be installed. This is also the time when any subterranean features, like wells or a basement, will get dug.
Naturally, the footing concrete needs to be left alone so that it cures, so the construction site takes a break. To bear the weight of the foundation and the house on it, footings often need to be wider than everything sitting on top of it.
Lastly, all you need to do is pour the foundation onto the footing and the rudimentary frame that you have, which will be improved upon later. Concrete can take a while to properly cure, especially in large quantities and in areas where it is warm. This can take a few weeks, a month, or even two months.
Consult the relevant professionals to find the perfect curing time for your concrete and the type of build you are doing.
An important but overlooked part is waterproofing the foundation. Water beats everything when given enough time, so a waterproof membrane is often added to both the footing and the foundations. This stops residual and seeping water from the ground, so it doesn’t gradually wear away the foundations and weaken the home.
Rough Framing
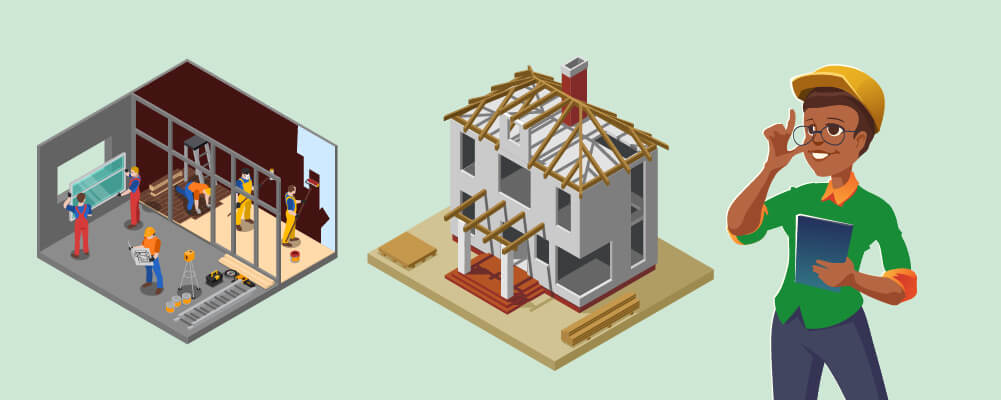
Framing starts when the builder places wooden markers as a template for where the foundation will go. This involves digging trenches and holes around the framing, too.
At this point, the footprint of your home should be plain to see. This is where the main framing starts, where walls and a roof skeleton are erected. These are made with plywood or other inexpensive wooden parts, which are then wrapped in protective wrapping to keep everything together. This is also where window spaces are left for future reference. If needed, a waterproof wrap is also added to keep wood rot and mold away.
As roofing, sides and windows are the main defense against the elements, you may want to hire a contractor to handle this important step. Companies like G.H. Clark handled these areas with care and dedication. If you discuss the rough plans with a contractor at this stage, they can use their expertise to eliminate any concerns about structural integrity.
This whole process can take months, though smaller homes will take less time. As for the cost, it is typically calculated by square footage. It can be $8 to $16, or even more depending on the services you’re getting.
There will be ditches and trenches dug for certain things that haven’t been added yet like the plumbing system. However, any other trenches that were dug around the framing just to install the footing can be refilled now, and they’ll provide extra support to the skeleton as more and more is added to it.
Rough Plumbing
With the frame mostly complete, you need to add some functionality to it. This means adding electrical and plumbing systems to provide warmth, entertainment, and hygiene to the occupants of the home. Seeing as that’s you, it’s something you’ll want to take seriously during the build process.
Here’s a list of just some of the things you can expect when electricals and plumbing are being added, mainly the following:
- Baths and showers
- Ducts for HVAC systems
- Electric wiring and other features
- HVAC vents and piping
- Pipes and other types of wiring
- Sewer fixtures and related vents
- Water supply lines.
All of these, with the foundations, form the basic shell of a livable home. With this shell complete, it’s time for siding and a roof to get installed. Before that happens, however, you need to put some of those plumbing and electrical systems in place.
Unless you’re skilled at both electricals and plumbing, you will absolutely need to get a professional during this stage. Electricity is dangerous, we all know that, but plumbing also works with unsanitary water and high pressure, making it just as dangerous. Also, you’ll have trouble passing inspections if the work wasn’t done by a licensed professional who was qualified for the job. We have more details about the inspections process at the end of this guide.
With all of this work, you should be looking at a five-figure bill. This is probably the single largest expense that is associated with building your home. You’re paying for essential and technical work that most people can’t do, plus the people who did it need to get paid for their services rendered.
Paying electricians and plumbing tradesmen can take up nearly $10,000. If you throw in other wiring jobs and amenities, like an HVAC system for instance, then you’re looking at even more.
After everything has been completed, it needs rigorous inspections to make sure everything is above-board. If something is wrong, it will probably rear its ugly head later and result in very costly repairs. As we have mentioned already, we have more on inspections in a later section.
Install Insulation And Drywall
With the base of the house complete and some essentials added, it’s time to look at the exterior. More specifically, it’s time to look at the insulation and drywall that need to be put in place, along with the specific pipes and electricals that need to be worked into the wall.
Pipes & Electricals
The pipes that thread through the walls of our homes are just like the plumbing system itself, in that they need to be laid by a plumber. In fact, the pressure is highest when water is being pushed through a pipe, so there could be more danger or mess if you make a mistake. Any pipes are added and then covered up, so they’ll get added before the insulation and drywall are thrown on. Later, fixtures connected to pipes, like faucets, will also need to be added by the plumber.
The same can be said for the wiring that needs to go through a home. After the wiring has been added by a qualified electrician who knows what they are doing, the insulation and drywall can come in to secure the walls. Then, the electrician can come back and add superficial elements like light switches and other surface-facing electrical fittings.
Fittings
With the house beginning to take shape, you need to add insulation and drywall. Insulation is very important as it regulates the temperature inside the home. Many know that insulation keeps the cold out but it also keeps the warmth in when you need it.
A well-insulated house will also be cooler on hot days since less heat makes its way inside. As a result, the home becomes more energy-efficient, so it saves you money and improves the sell value of the property.
Insulation is placed in the exterior walls only, then the ceiling. It is made from foam or fiberglass typically, though other materials are used to tackle the challenges of building in different climates. There are even wools made from stone that provide the home with the protection it needs, from both the temperature conditions but also critters too.
Its price varies a lot because of the different insulation materials and strategies out there. Fortunately, newer homes are cheaper for insulation services because adding them to an in-construction house is a breeze.
Then comes the drywall, which is fitted onto the frame you currently have. It is taped to the frame walls and glued/taped at the seams so the imperfections between boards of drywall are not visible. The drywall is given a lick of primer paint and then left to dry. It is primarily used for interior walls that don’t need the thickness or the protection that the exterior walls of the property have.
This whole process can take two weeks, give or take a few days.
Completing Interior And Exterior Walkways
Now that the house looks more like a house, it’s time to make it look homely. To do this, you need to install the following:
- Interior doors
- Door casings
- Windowsills
- Baseboards
- Cabinets
- Stair banister
- Mantels
- Wallpaper
- Other decorative trims
All of these transform blank drywall into something more homely and lived-in. You’re building a home, not a warehouse or office block, and that means it should have most of these trimmings. It’s also an opportunity to express your style since you can get many of the items in that list in different styles.
Along with these interior trims and their finishes, you should also turn your attention to the exterior walkways of your home. By now, the site is probably a mess. Now is where you clean that up and install any paths, patios, or driveways that need to get installed. Remember that curb value is very important for real estate agents and timid house buyers. If you ever plan on selling your home, even in the distant future, you need to have a great curbside profile that invites people in.
Installing exterior fixtures isn’t easy, it can take months – much longer than any interior changes. It can cost more, though it depends on what you’re adding to the curbside view of your house.
If you have hopes of landscaping, wait until your house is done first. While similar, you can always get landscapers out to work on your home from the outside after you’ve finished building it.
This typically happens toward the end of a build because it involves pouring a lot of concrete. Concrete can get damaged by heavy machinery, so they need to have done their job and left the site before large walkways are poured.
Painting Walls And Installing Flooring
Next is the flooring, then a lick of colored paint.
Flooring varies wildly from home to home. No two places have the same flooring setup, not to mention that houses have multiple types of flooring depending on the room. It’s unusual to have carpet in a bathroom, for example, and tiles/stonework are preferred in kitchens.
There’s also vinyl and wooden flooring to consider too. What you choose is a matter of personal preference, of course, along with what you can afford and what you can feasibly install yourself if you haven’t got contractors working for you.
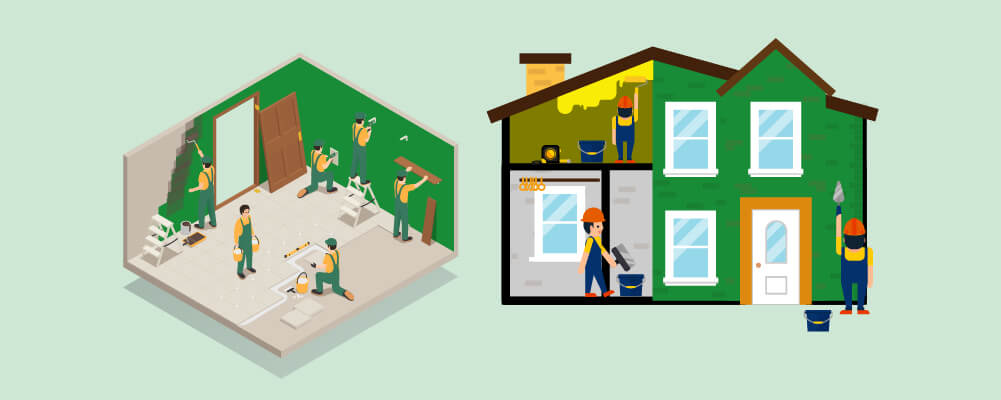
The drywall may have a primer coat on it but it’s not done yet. Now you need to paint over the walls inside the home again. Once again, we can’t tell you exactly what to do, since everybody prefers something different when decorating their home. This is the part where you can truly let your imagination run wild and decorate your home however you please.
If we have any advice, you should invest in a boilersuit and a roller, then get to work. Spray-painting tools can be great for exterior painting too, though you’ll want to take time to practice and make sure you have a good aim with one. You don’t want to accidentally give some rented construction equipment a new paint job.
You’ll need to get multiple colors too unless you’re planning on painting every room the exact same. If you want to go with the professional approach, create a color palette, a database of all the colors that you’re using in your home. This can make choosing paints easier and enable you to decorate your home in a way that makes sense while still expressing yourself.
When you do get round to painting, try to keep some spare. That way, you can do touch-ups and other small jobs that may come along when the construction job is done. It doesn’t take much to chip paint off of a wall, especially on a construction site, so keeping spare paint will save you time and money in the future. It can be a nightmare finding the exact same shade of color that you used three years ago.
Final Inspections
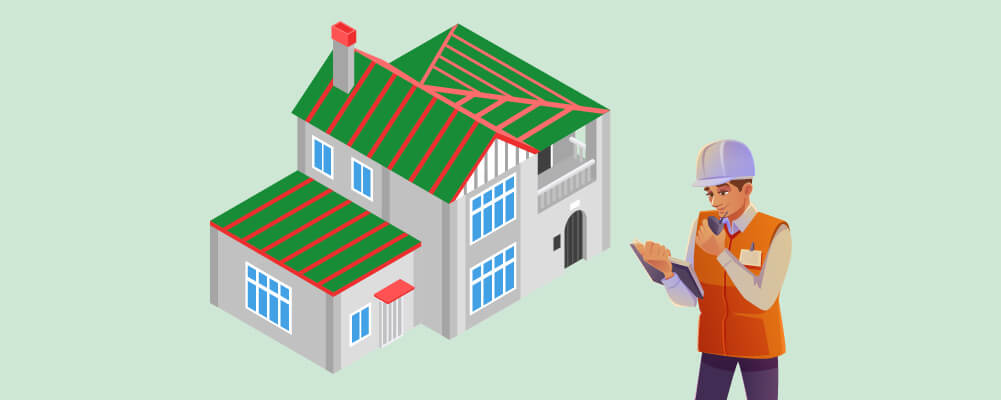
There are many different inspections involved when you are building your own home. When going on this journey, you’ll need to make sure that you’re doing it right every step of the way. If not, you’re going to run into problems later. Many of them will need expensive repairs and some of them might even be dangerous.
In a typical construction, there can be as many as five separate inspections that your project must pass. Depending on where you are and what you’re building, you may need to jump through more or fewer hoops.
- The earliest inspection you can expect will review the foundation. After the concrete poured at the footing and foundation has cured, an inspector will be required to make sure it’s up to code. The project can’t continue until the foundations have passed the inspection.
- The second, third, and fourth inspections happen in close succession. First, you need a framing inspection for the skeleton that you have made of the home. This makes sure you’re following the blueprint and not overstepping your permissions, while also testing how strong and well-made it is.
- Next, an experienced plumber needs to survey the work that has been done. The inspector shouldn’t be the person who did the work in the first place – they are likely to be biased toward their own work.
- Likewise, then a qualified electrician needs to sign off on the work that has been done and test it for common issues. With those three inspections passed, insulation and drywall are added to the house’s skeleton.
- Finally, the big all-in-one inspection happens by somebody who works for a building code regulator. They have the power to issue a certificate that says the home is fit for human habitation, providing you with evidence that you are legally occupying the home at the same time.
If any defects are identified at this stage, follow-up inspections will probably be needed to find the root of the problem, fix it, then re-investigate the house to make sure all is in order.
For some houses built by experienced professionals, the last round of inspections can take a week! Don’t fret if there are defects, most are easily corrected if you got the basics correct.
If you worked with a contractor and haven’t had much input with the home, you will also be treated to a final walk-through. This is similar to where a real-estate agent walks the buyer through a home for sale, except you already own the place and you’re just getting to know the place.
This is typically an informal event, unlike the other inspections where everything needs to be perfect. It is, however, an inspection done by yourself where you should check everything works and bring up any concerns you have with your contractors.
If you built most of the house yourself, a walk-through is redundant since you’ll be painfully familiar with the build, its high points, and its low points. While the process of self-building can be long and arduous, it does guarantee that you get something that was built to your standards.
Hiring A Contractor

We suggest hiring a contractor, like G.H Clark, for any important aspect of the build which you are not confident in. If you are already a deck builder by trade, then completing that part of construction yourself makes sense. But if you have never attempted something of this magnitude before, hiring professionals can speed up the process and avoid costly mistakes.
Using G.H Clark Contractors as an example, the company can build fiberglass shingle roofs, flat roofs or metal roofs to match your style while still being functional. They can install vinyl, polymer shake or fiber cement slides to create beautiful country-style outward aesthetics.
They can install and replace windows with care, making custom designs if requested. And they can install energy efficient doors which help trap or release heat, lowering the cost of your energy bills. The list goes on!
Using a company like this can allow you to get the best deal while creating a home which matches your vision. You are in control and you get all the professional help you need.
Finishing Up And Conclusion
Those are the broad steps that are needed to build a house from scratch. As you can see, there are many logistical concerns before you even start, and even more waiting for you after you are finished!
It takes a lot of planning and dedication to build your own home, but it is rewarding too. You don’t just get to design your own space and use your favorite materials; you can also save some money by doing most of it yourself. Even with the most hardcore DIY builds, you’ll likely need a licensed plumber and electrician to install the dangerous systems that turn a house into a home.
Self-builds take months, during which you need to be prepared for hiccups and disruptions. Hopefully, this guide has given you valuable insight into how building a home works, so nothing should take you by surprise.[/et_pb_text][/et_pb_column]
[/et_pb_row]
[/et_pb_section]
Must-Know Tips for Cleaning Your Windows
/in Windows/by G.H. Clark ContractorsWindow cleaning is one of those tasks that many people dread. It can be tedious and time-consuming, not to mention dangerous, if you’re not careful. But it doesn’t have to be that way! You can clean your windows quickly and easily with some know-how and the right tools. Here are some tips to get you started:
https://youtu.be/3xiCFWtE00g
Clean your windows at least once a week for streak-free results
When cleaning your windows, there are a few key things to remember. First, you’ll want to clean them at least once weekly for streak-free results. Second, use a gentle cleaning solution and avoid harsh chemicals. Third, dry your windows entirely after cleaning to prevent water spots. Fourth, use a lint-free cloth or squeegee to avoid streaking. Lastly, don’t forget to clean the frames and sills as well!
By following these simple tips, you’ll keep your windows looking sparkling clean all season long. However, if you have any concerns about cleaning your windows, contact a professional for help. They will have the knowledge and experience to get the job done right. With the proper care, your windows will look great for years to come!
Use a vinegar and water solution to clean the windows – it’s safe and effective
In cleaning your windows, you want to avoid any harsh chemicals. A great way to do this is by using a vinegar and water solution. Mix equal parts of each in a spray bottle and use it to clean your windows. You’ll be surprised at how well it works! Plus, it’s safe for both you and the environment.
If you have any stubborn stains, try using a little vinegar and water on a cloth. Rub the stained area gently, then rinse it with clean water. You may need to repeat this process a few times for tough stains, but avoiding harsh chemicals is worth it. However, if the stain is still tricky, you may need to call a professional. They will make quick work of it and have your windows looking great in no time!
Dry your windows after cleaning to prevent water spots
Once you’ve cleaned your windows, it’s essential to dry them completely. This will help to avoid any water spots from forming. You can use a lint-free cloth or squeegee to dry your windows. Please go over the entire surface until it’s scorched. If you’re having trouble getting all the water off, try using a hairdryer in a cool setting.
Just be sure to hold it several inches away from the window to avoid damaging the glass. Once you’re finished, your windows should be streak-free and water spot-free. Water spots on your window can be challenging to remove, so it’s best to avoid them altogether! With proper care, your windows will look great for years.
Apply the solution with a soft cloth or sponge for best results
You’ll likely want to apply your cleaning solution with a soft cloth or sponge. This will help to avoid streaking and will leave your windows with a streak-free shine. Spray the solution on the cloth or sponge and then wipe it over the surface of the window. Be sure to review the entire surface, including the frames and sills.
Try using elbow grease if you’re having trouble getting all the dirt and grime off. However, be careful not to scrub too hard, or you could damage the glass. Once you’ve finished cleaning, rinse the cloth or sponge and put it away for next time. With proper care, your windows will stay clean and streak-free all season long!
Use a lint-free cloth or squeegee to avoid stress
Lint-free cloth or squeegee is essential for avoiding streaks when cleaning your windows. Wet the fabric or squeegee before use and wring it out thoroughly. This will help to prevent streaking and ensure that your windows are left with a streak-free shine. Wipe the surface of the window with the cloth or squeegee, being sure to cover the entire surface.
Use elbow grease if you’re having trouble getting all the dirt and grime off. However, be careful not to scrub too hard, or you could damage the glass. Once you’ve finished cleaning, rinse the cloth or squeegee and put it away for next time. Using this procedure, you can avoid the stress that can lead you to scrub too hard and damage the glass.
Call in a professional for difficult jobs
There are some cases where it’s best to call in a professional. If you have very dirty or difficult-to-reach windows, it may be time to contact a window cleaning company. They will have the knowledge and experience to get the job done right. With their help, your windows will be clean and streak-free as a bonus to relax and enjoy your free time while they do all the work.
A professional window cleaner can be beneficial. They will have the knowledge and experience to get the job done right. With their help, your windows will be clean and streak-free as a bonus to relax and enjoy your free time while they do all the work. Their expertise can save you time and frustration, so it’s worth considering if you have difficult-to-clean windows.
Cleaning your windows doesn’t have to be a chore
Cleaning your windows doesn’t have to be a chore. Using the right tools and techniques, you can easily clean your windows and avoid streaks. Be sure to use a soft cloth or sponge to apply the solution and avoid scrubbing too hard. Use a lint-free cloth or squeegee to dry your windows and prevent water spots. And if you’re having difficulty cleaning your windows, don’t hesitate to call in a professional.
With proper care, your windows will look great all season long. In the meantime, enjoy your clean and streak-free windows! As a bonus, you can relax and enjoy your free time while they do all the work. Don’t hesitate to call a professional whenever you need help with your windows. They’re always happy to help!
Wipe in a circular motion to avoid streaks
When cleaning your windows, be sure to wipe in a circular motion. This will help to avoid streaks and will leave your windows with a streak-free shine. Spray the solution on the cloth or sponge and then wipe it over the surface of the window in a circular motion. Be sure to review the entire surface, including the frames and sills.
Spraying in a circular motion can help avoid streaks. Wipe the surface of the window with the cloth or sponge in a circular motion, sure to cover the entire surface. Use elbow grease if you’re having trouble getting all the dirt and grime off. However, be careful not to scrub too hard, or you could damage the glass. Once you’ve finished cleaning, rinse the cloth or sponge and put it away for next time. This will help to prevent streaking and ensure that your windows are left with a streak-free shine.
Repeat on the other side of the window
It is commonly said that you should clean the inside of your windows first and then the outside. This is because if you tend the outside first, any dirt or streaks will be transferred to the inside when you clean it next. So be sure to repeat the process on the other side of the window before moving on to another window.
When cleaning your windows, be sure to start on the inside and then move to the outside. This will help avoid streaks and ensure that your windows are left with a streak-free shine. If you start on the outside, any dirt or streaks will be transferred to the inside when you clean it next. So be sure to repeat the process on the other side of the window before moving on to another window.
Use a ladder or an extendable pole to clean the hard-to-reach areas
A ladder or an extendable pole would be best to clean the hard-to-reach areas. This will help you avoid streaks by reaching all areas of the window. When using a ladder, be sure to follow safety precautions. And when using an extendable pole, be sure to use it with care.
When cleaning your windows, use a ladder or an extendable pole to clean the hard-to-reach areas. This will help you avoid streaks by reaching all areas of the window. When using a ladder, follow safety precautions. And when using an extendable pole, use it with care.
Cleaning your windows doesn’t have to be a chore. Using the right tools and techniques, you can easily clean your windows and avoid streaks.
Summary
In conclusion, these are some of the things you should keep in mind when cleaning your windows. By following these tips, you can avoid common mistakes and ensure that your windows are clean and sparkling all year round!
If you’re looking for a trusted windows cleaning agency, G.H. Clark Contractors is the best in the business. Not only do we have experience, but we also guarantee our work.
Contact us today at (410) 414-7060 for a free quote!
8 Signs You Need A New Roof
/in Roofing/by G.H. Clark Contractorshttps://youtu.be/3RfDDkVVW0o
1. Your roof is missing shingles.
Your roof may be missing shingles, and you may not even know it. Shingles are an essential part of your roof. If they’re missing, your roof is vulnerable to water damage and other problems. If you see any of the signs below, it’s time to call a roofing contractor and get a new roof. Missing shingles on your roof is a serious problem that needs an immediate roof replacement.
Shingles on your roof are an essential part of your roof. If they’re missing, your roof is vulnerable to water damage and other problems. It will cause plenty of expensive repairs if not replaced in time. However, with a new roof, you will never have to worry about these shingles again. So it’s better to be safe than sorry, and if you see any of these signs, you know it’s time for a new roof!
2. There are leaks in your ceiling.
Your roof is one of the essential parts of your home. Not only does it keep you and your family protected from the elements, but it also adds insulation and value to your property. But when there is a problem with your roof, it can cause severe damage to your home. One of the most common signs that you need a new roof is if you have leaks in your ceiling. If you notice water stains on your ceiling, you must get them checked out as soon as possible.
Leaks can be caused by various things, including damaged shingles, flashing that’s not installed correctly, or even ice dams. If you ignore a roof leak, it can cause severe damage to your home. Water can damage your ceilings, walls, and floors. It can also lead to mold and mildew growth, which can be a health hazard. If you leak your roof, getting it fixed as soon as possible is essential. But if it is a big leak, it is better to have a new roof.
3. The flashing around your chimney is damaged.
Your home is one of the most important investments you’ll ever make, and it’s essential to take care of it. One way to tell if your home needs some TLC is by checking for signs that you need a new roof. A good roof will protect your home from the elements and keep it looking great, so it’s essential to look for potential problems. But if your roof has a problem, it is necessary to act quickly to avoid further damage.
Such as flashing around your chimney is damaged, which can lead to water damage in your home. It results from water seeping through the cracks and crevices in your roof and can cause severe damage if left unrepaired. Having your flashing checked and repaired by a professional roofer is essential to maintaining the integrity of your roof. But if it is not possible, you should consider replacing your roof.
4. You have moss or algae growing on your roof.
A mossy or algae-covered roof is a sure sign of roof damage. These growths are usually found on roofs with much shade, as they need moist conditions to survive. If you have moss or algae growing on your roof, it’s essential to have it removed as soon as possible. Two types of moss can grow on your roof: wood moss and roof moss. Wood moss grows on the northern side of trees, while roof moss is found on roofs.
Both types of moss can damage your roof by growing in between the shingles and lifting them, which leads to leaks. Moss can also hold moisture against your roof, leading to rot. However, the biggest problem with moss is that it’s a fire hazard. If you have a wood-burning fireplace, the moss on your roof can act as kindling and start a fire. So, if you see any moss on your roof, be sure to have it removed right away. That’s why it is essential to have your roof regularly inspected by a professional.
5. The gutters are clogged and water isn’t draining properly.
Many roofing problems stem from an issue with the gutters. If your gutters are full of debris, they will be unable to do their job correctly. As a result, water will build up on your roof and eventually make its way into your home. It is advisable to clean your gutters at least twice a year to prevent this from happening. Clogged drains result from a lack of maintenance and can be a serious problem if left unchecked.
It can be caused by a few things: dried leaves, twigs, and branches. This happens when the water can’t flow through the gutters and down the spout, so it backs up and onto your roof. It will eventually seep into your home if you don’t take care of it. So, if you notice your gutters are full, it’s time to clean them out. And if it gets more extensive, it might be time to think about a new roof.
6. Your roof is more than 20 years old.
A typical asphalt shingle roof will last between 20 and 25 years. If your roof is approaching this age, it’s time to start thinking about replacing it. It is recommended for a complete roof replacement every 20-30 years to avoid any significant problems. If such matter disregards, it will lead to a decrease in the home’s value and energy efficiency.
Other than that, the old and weak shingles are easily broken and torn off, which can cause serious problems during a storm. It can also let water and moisture enter the home, leading to wood rot, mold, and other structural damage. And if it is continued to be neglected, the roof can collapse. And it will create a greater possibility of accidents and injuries. So, if you don’t want to deal with those problems, it’s time for a new roof. It is better to be safe than sorry.
7. Your roof valleys are filled with water.
Water must flow smoothly off your roof and into your gutters. If you notice standing water in your roof valleys, it’s a sign that your roof isn’t draining correctly. A blockage could cause this in your gutters or a problem with the slope of your roof. Either way, having a professional take a look is a good idea. A blocked gutter can usually be fixed with a little bit of elbow grease, but it will need to be repaired or replaced if the problem is with the roof itself.
However, if your roof valleys are only wet after heavy rain, this is not necessarily a cause for concern. The evaporating water is causing the problem, not a blockage. But if your roof valleys are filled with water, it will eventually lead to leaks. This will result in more expensive repairs, so it’s best to have it checked as soon as possible.
8. You see daylight through your roof.
A hole in your roof is a sure sign that you need a new one. Not only is it unsightly, but it’s also a significant safety hazard. If you see daylight through your roof, it’s time to call a professional for help. It is a sign of significant damage that must be repaired as soon as possible. You can patch a hole temporarily, but it’s only a matter of time before the rest of your roof needs to be replaced.
It is the result of years of wear and tear, and it is not something that can be repaired easily. It is disregarded by many people but fixing it should be a priority. However, if you want to do it on your own, know that it is a difficult task that requires special tools and skills. But remember, your safety is more important than saving money. So it is better to replace it than risk your life trying to fix it. A reliable roofing contractor can help you choose the right roof for your home and provide a professional installation.
Summary
Need a new roof? G.H. Clark Contractors are your local roofing experts. We have been providing quality roofing services for years. We are fully licensed and insured, and our team of experienced professionals is dedicated to ensuring your complete satisfaction.
We understand that choosing a contractor can be a difficult decision. That’s why we offer free estimates so you can make an informed decision before committing to anything. We want you to be satisfied with your new roof and will work hard to ensure that happens.
Contact us today for a free estimate on your new roof![/et_pb_text][/et_pb_column][/et_pb_row][/et_pb_section]
What are the Best Options for Materials for your Deck?
/in Decks/by G.H. Clark ContractorsAnd when it comes to decking, most homeowners have a few key priorities: they want their deck to be beautiful, long-lasting, and affordable. Luckily, various materials are available that can meet all of these needs. Here are some of the best options for materials for your deck.
Options for building a deck
Homeowners have a couple of options for the materials to use for their deck at home. Here are those options:
Pressure-treated wood
When it comes to deck materials, pressure-treated wood is a popular option. And for a good reason – it has a ton of benefits! First and foremost, pressure-treated wood is incredibly durable.
Pressure-treated wood can withstand years of wear and tear, making it a great choice for decks used frequently. It has an average lifespan of 15 years. But if they are maintained properly, they can last up to 60 years.
In addition, it’s very affordable, making it a good choice for those who are on a budget. The price of using pressure-treated wood can vary depending on the supplier. The cost of pressure-treated wood can range between $5 and $8 per square foot.
Composite wood
Composite wood is a popular choice for decks because it is durable and weather-resistant. It also doesn’t require much maintenance, making it a low-stress option for homeowners. Composite wood is made of recycled materials, so it is environmentally friendly and comes in a variety of colors and textures to suit any style.
Decks made of composite wood can endure a wet environment without decaying. They are also resistant to fading and staining. Additionally, they do not warp even if exposed to high temperatures.
Composite wood is a more expensive option for decks than traditional wood, but it is worth the investment. Composite decks are low-maintenance and long-lasting, so they will save homeowners time and money in the long run. They cost between $5 and $13 per square foot.
The average lifespan of composite wood decks is from 25 to 30 years. But they can last longer through proper maintenance. The durability of composite wood material makes it ideal for the climate of Maryland. So, if you are looking to have a deck built in your Maryland home, you should consider using composite wood for it.
Polyvinyl Chloride or PVC
There are many benefits to using polyvinyl chloride or PVC for decking material. PVC is a synthetic polymer that is made from petroleum. It is a very durable and versatile material with many applications, including decking.
PVC decks are waterproof and stain-resistant. They are also fade-resistant, which means they will maintain their color for many years. PVC is also low-maintenance and easy to clean. You can power wash your PVC deck or hose it down with a garden hose.
Decks made out of PVC material can cost between $5 and $13 per square foot. And they can last up to 30 years.
There are a variety of materials homeowners can use for their deck, each with its own set of benefits. The best option for your home will depend on your needs and budget. So, take the time to consider all of your options before deciding. And be sure to consult G.H. Clark Contractors, Inc. for your deck project and get a free estimate.[/et_pb_text][/et_pb_column][/et_pb_row][/et_pb_section]
Heating Your Home Will Be More Expensive in 2022
/in Repairing/by G.H. Clark ContractorsIncreasing fuel costs significantly affected the heating costs of households across the country. In 2021, the Energy Information Administration (EIA) forecasted an increase of at least 30 percent in heating costs among families using natural gas as their primary fuel source.
But another event caused fuel prices to continue rising even though summer is just around the corner. The conflict between Russia and Ukraine resulted in economic sanctions on the world’s second-largest dry natural gas producer. These sanctions increased the prices of natural gas in the market.
Effects of the Russia-Ukraine conflict on fuel prices
The Russia-Ukraine conflict has had a significant impact on fuel prices in the US. Crude oil prices have increased significantly since the conflict began, and this increase has been passed on to consumers. As a result, it is expected that homeowners will pay more for heating their homes in 2022 than they did in 2018.
While the conflict has been going on for several years, it escalated in 2014 when Russia annexed Crimea. This led to Western sanctions against Russia, which caused oil prices to increase. Since then, the situation has stabilized somewhat, but oil and gas prices are still higher than before the conflict began.
Even as Europe and the US are working to reduce their dependence on Russian energy, the conflict has still impacted. In particular, it has led to higher prices for natural gas and propane, which are used to heat homes in many parts of the US. As a result, homeowners in states that use these fuels will increase their heating bills in 2022.
How heating costs will increase in 2022
The cost of heating your home is expected to increase substantially in the coming year. This rise can be attributed to several factors, including rising fuel costs and inflation.
While you can take steps to reduce your heating bills, you must prepare for these increases now by setting aside more money each month for heating your home.
One of the main drivers behind rising heating costs is increasing fuel prices. In addition, there is also inflation to consider. These factors will continue to push up heating costs in 2022 and beyond, making it even more critical for you to take steps now to reduce your overall costs.
Tips for mitigating rising heating costs
Heating your home in the wintertime is necessary, but it can be quite costly. Natural gas and electricity prices are expected to increase as utility companies raise their rates over the next several years. Here are some ways to manage these costs and keep your household comfortable during the cold months:
Taking these steps will help you mitigate the impact of rising heating costs in 2022 and beyond. And remember to be always mindful of your energy usage to reduce costs and stay warm throughout the winter months.
You should also contact G.H. Clark Contractors, Inc. to get a free estimate for your window replacement project.[/et_pb_text][/et_pb_column][/et_pb_row][/et_pb_section]
Roof Maintenance Tips for the Summer
/in Roofing/by G.H. Clark ContractorsSummer is a time when many people take care of home repairs they have been putting off all year. One such repair that you should not put off is roof maintenance. A well-maintained roof can protect your home from the elements and add value to your property. We created a guide that you can use to take care of your roof this summer. The guide includes tips to help you maintain your roof, including installing gutter protection in Maryland.
Importance of checking the roof in the summertime
The summertime is a great time to check the roof for any necessary maintenance. Ultraviolet (UV) radiation and heat can cause damage to the roof, so it’s essential to inspect it regularly and make any necessary repairs.
A damaged roof can lead to water infiltration, which can cause serious damage to your home. So be sure to keep an eye on your roof this summer and take steps to maintain it properly.
Effects of the summer sun on the roof
The summer sun can significantly impact the roof, especially if the roof is not properly maintained. The sun can fade the roofing material, causing it to lose its color and eventually requiring replacement.
The heat can cause the roof to expand, leading to cracks and leaks. UV rays can also cause asphalt coating of roof shingles and cause them to wear out. This situation can lead to water damage when it rains.
The heat can also affect the roof’s durability since the roof’s coating will absorb the radiation, causing the coating to deteriorate.
Tips for maintaining the roof for summer
Here are some tips to help you ensure the proper maintenance of your roof for summer.
Proper roof maintenance is essential. But you should contact a professional roofer to perform major repairs to avoid getting injured. Roofers are most at risk of suffering injuries due to falls. So, you should leave some roof maintenance tasks to them. These tasks include:
Perform necessary repairs as soon as possible to prevent minor problems from becoming bigger, more expensive ones.
As you can see, there are many things that you need to do to keep your roof well maintained for the summer months. By following these tips, you can help ensure the longevity and durability of your roof for years to come.
You should also contact G.H. Clark Contractors, Inc. to keep your home comfortable and looking good this summer.
[/et_pb_text][/et_pb_column][/et_pb_row][/et_pb_section]A Step By Step Guide On Building Your Own Home
/in Repairing/by G.H. Clark ContractorsIntroduction
When it comes to building your own home, you may have no idea where to start. Most of us don’t think about the exact process that is used to construct the houses around us, which can make the prospect of building one very daunting.
In this guide, we have detailed the process of building your own home from the first step to the last. For most people, and most buildings, you’re going to need some help. Whether it’s professional contractors or a few of your friends that know what they’re doing, you’ll need a team if you plan on building an entire house capable of housing multiple people.
Don’t worry, we have the entire process outlined below. We have also included links to supporting material that gives you more information about certain construction principles and techniques. No house is exactly the same, after all, so you may need to do some extra reading to realize your dream home!
Let’s start at the beginning with the things that everybody should consider.
Table of contents
Things To Consider Before You Start
Nobody wants to be halfway through a construction project before realizing it’s not a feasible build. You need to think a lot about your project before you even start. If you’re here, you’ve probably already given the build some thought. That’s great!
If not, then don’t worry. We have the three main things that disrupt and delay construction projects detailed below. Such delays can be costly, so you must have everything figured out beforehand so your build can be faster and more affordable.
Plans And Permits
First, paperwork. It’s not the most exciting thing, sure, but it is essential for building in any modern country on the planet. You’ll need to get permission before you start building, otherwise, the local authorities can and will tear the place down. If you own the land, you should still check if permission or an alert for the local government is required – it’s not always clear and differs between jurisdictions.
Through the process of gaining planning permission and building permits, you’ll also need to formalize your designs. This means you’ll settle on a blueprint for the home and won’t change it once the project has started (or you’ll need to notify and get permission for any changes/extensions that may be added).
So, you’ll need to have the design of your home figured out, too. This means knowing how many floors the home has and how many rooms are in each one, along with important maintenance information such as ventilation and those other unseen components that make our modern homes comfortable to live in.
These designs are best drafted up by a professional, of course. You’ll also need to show how the home will look from the outside, something that an architect does, though you’ll need to contract and pay them if you don’t have the skills yourself.
If you haven’t already figured it out – this can be a long process. Fortunately, houses are smaller than larger buildings that take even longer to plan and get permission for. On the flip side, your local authorities may process larger projects faster, because they’re more lucrative to the community. As an individual who just wants to build their home, you may get pushed back while bigger, more important permissions are granted. This all depends on how your locale is governed, of course.
Understanding Your Budget
Along with knowing what you’re going to build, you should also know how much it’s going to cost. Once again, the specifics will vary depending on your available funds, the nature of your project, and where you are in the world, country, and even state.
If you’re working with contractors, you should be able to get a quote after finalizing your project plans and letting them take a look. You’ll also need to pay for the materials that are being used, which will take up a significant portion of your budget, along with paying any specialists that are working with you to make the building.
Remember that contractors speed up the building process. Companies like G.H. Clark can take care of the physical creation of the whole building or just single aspects. Having a professional take on important structural roles can save you a lot of money in the long run, as they can secure your structural integrity.
Self-builds can be the cheapest or most expensive projects to attempt, depending on how you handle the budget and how fast and effective you can get the job done. Labor and material costs don’t come cheap, so you’ll want to be careful with how you handle the money.
Like with most budgets, it’s a good idea to retain anywhere from 10% to 20% more than you think you’ll need. That way, you have backup funding for unexpected issues, and you won’t run out of money halfway through the build.
Funds should be sourced from your savings, money from the sale of a previous home if you’re building a new one because you recently sold, or from secured funding elsewhere. That usually means taking out some kind of loan, which will need to be paid back with interest later.
If you haven’t got the funds right now, a loan can be great. That said, it can be dangerous if you’re financially irresponsible and have other types of debt weighing down on you. It’s also risky to borrow money from family and friends – you need to have a very strong relationship to withstand lending money to one another, especially if you may struggle to pay it back.
Needless to say, if you do opt for third-party funding, you need to have a solid plan first that you’ll follow to the letter. These ensure that the project gets completed fast and the loan is paid back on time.
Many establishments offer self-build mortgages for those who are making their own home out of thin air. These mortgages are handed down by banks and finance all or part of the build, to be paid back at a later date. You’ll usually need to front 25% of the entire project cost to the lender, though you may be able to find exceptions to this rule.
They’ll also give you the money in doses, at each major step of the construction process. This ensures you don’t take the money and spend it all on the foundations.
While self-build mortgages are better and more trustworthy than taking out a random loan, you need to be reliable and meet your mortgage payments. You’ll also need to agree on a plan of action with your provider and, once they consent, you can’t divert from it or you risk losing your funding.
Spacing
You’ll have some idea of how your project will be spaced through the planning and permitting process, though you should give this a lot of thought. A project that starts and then stops because of improper spacing planning will cost a lot more due to delays, especially if you’re hiring contractors or renting equipment. Also, time is money anyway, if not more valuable.
Contractors may also charge based on a set price per square foot, so knowing all of the relevant numbers is important. You can measure square footage by staking out the grounds of your home and then measuring it, then measuring it again to make sure your first measurements are correct.
You don’t just need to know if the patio will fit behind the home, you need to make sure everything is properly spaced inside the house too. The rooms should be proportionate and you don’t want a bathroom three times the size of the living room.
For fixtures, make sure that they are appropriately placed in certain rooms. If you have a fireplace, for example, you don’t want it to be off-center and in the way of anything else in the room.
Setting Up Foundations
To start, you’ll need to set up the foundations. Where else would you start? You could start with some minor landscaping if you own the land and want to make some small changes but, for the house itself, you need to start from the bottom.
There’s a formula for setting up foundations, outlined in the three subsections below.
Before throwing concrete down on the ground, you need to make sure some preliminary steps are taken so that the foundation of your foundation isn’t compromised. First, the site of the foundation needs to be leveled. Crews often do this using bulldozers, backhoes, or some other equipment out of the average person’s reach. You can also rent the equipment if you know how to use it.
Concrete
When laying foundations, you need to prepare the ground before introducing concrete to it. As we said, you need to level it, along with clearing any debris that may become a problem.
You also need to stake the ground to make sure you know where the footprint of your home is. This guides where you need to dig and makes sure your footing and foundations aren’t off.
To stop the home from sinking further into the ground, footings made from either concrete and rebar or brickwork need to be installed. This is also the time when any subterranean features, like wells or a basement, will get dug.
Naturally, the footing concrete needs to be left alone so that it cures, so the construction site takes a break. To bear the weight of the foundation and the house on it, footings often need to be wider than everything sitting on top of it.
Lastly, all you need to do is pour the foundation onto the footing and the rudimentary frame that you have, which will be improved upon later. Concrete can take a while to properly cure, especially in large quantities and in areas where it is warm. This can take a few weeks, a month, or even two months.
Consult the relevant professionals to find the perfect curing time for your concrete and the type of build you are doing.
An important but overlooked part is waterproofing the foundation. Water beats everything when given enough time, so a waterproof membrane is often added to both the footing and the foundations. This stops residual and seeping water from the ground, so it doesn’t gradually wear away the foundations and weaken the home.
Rough Framing
Framing starts when the builder places wooden markers as a template for where the foundation will go. This involves digging trenches and holes around the framing, too.
At this point, the footprint of your home should be plain to see. This is where the main framing starts, where walls and a roof skeleton are erected. These are made with plywood or other inexpensive wooden parts, which are then wrapped in protective wrapping to keep everything together. This is also where window spaces are left for future reference. If needed, a waterproof wrap is also added to keep wood rot and mold away.
As roofing, sides and windows are the main defense against the elements, you may want to hire a contractor to handle this important step. Companies like G.H. Clark handled these areas with care and dedication. If you discuss the rough plans with a contractor at this stage, they can use their expertise to eliminate any concerns about structural integrity.
This whole process can take months, though smaller homes will take less time. As for the cost, it is typically calculated by square footage. It can be $8 to $16, or even more depending on the services you’re getting.
There will be ditches and trenches dug for certain things that haven’t been added yet like the plumbing system. However, any other trenches that were dug around the framing just to install the footing can be refilled now, and they’ll provide extra support to the skeleton as more and more is added to it.
Rough Plumbing
With the frame mostly complete, you need to add some functionality to it. This means adding electrical and plumbing systems to provide warmth, entertainment, and hygiene to the occupants of the home. Seeing as that’s you, it’s something you’ll want to take seriously during the build process.
Here’s a list of just some of the things you can expect when electricals and plumbing are being added, mainly the following:
All of these, with the foundations, form the basic shell of a livable home. With this shell complete, it’s time for siding and a roof to get installed. Before that happens, however, you need to put some of those plumbing and electrical systems in place.
Unless you’re skilled at both electricals and plumbing, you will absolutely need to get a professional during this stage. Electricity is dangerous, we all know that, but plumbing also works with unsanitary water and high pressure, making it just as dangerous. Also, you’ll have trouble passing inspections if the work wasn’t done by a licensed professional who was qualified for the job. We have more details about the inspections process at the end of this guide.
With all of this work, you should be looking at a five-figure bill. This is probably the single largest expense that is associated with building your home. You’re paying for essential and technical work that most people can’t do, plus the people who did it need to get paid for their services rendered.
Paying electricians and plumbing tradesmen can take up nearly $10,000. If you throw in other wiring jobs and amenities, like an HVAC system for instance, then you’re looking at even more.
After everything has been completed, it needs rigorous inspections to make sure everything is above-board. If something is wrong, it will probably rear its ugly head later and result in very costly repairs. As we have mentioned already, we have more on inspections in a later section.
Install Insulation And Drywall
With the base of the house complete and some essentials added, it’s time to look at the exterior. More specifically, it’s time to look at the insulation and drywall that need to be put in place, along with the specific pipes and electricals that need to be worked into the wall.
Pipes & Electricals
The pipes that thread through the walls of our homes are just like the plumbing system itself, in that they need to be laid by a plumber. In fact, the pressure is highest when water is being pushed through a pipe, so there could be more danger or mess if you make a mistake. Any pipes are added and then covered up, so they’ll get added before the insulation and drywall are thrown on. Later, fixtures connected to pipes, like faucets, will also need to be added by the plumber.
The same can be said for the wiring that needs to go through a home. After the wiring has been added by a qualified electrician who knows what they are doing, the insulation and drywall can come in to secure the walls. Then, the electrician can come back and add superficial elements like light switches and other surface-facing electrical fittings.
Fittings
With the house beginning to take shape, you need to add insulation and drywall. Insulation is very important as it regulates the temperature inside the home. Many know that insulation keeps the cold out but it also keeps the warmth in when you need it.
A well-insulated house will also be cooler on hot days since less heat makes its way inside. As a result, the home becomes more energy-efficient, so it saves you money and improves the sell value of the property.
Insulation is placed in the exterior walls only, then the ceiling. It is made from foam or fiberglass typically, though other materials are used to tackle the challenges of building in different climates. There are even wools made from stone that provide the home with the protection it needs, from both the temperature conditions but also critters too.
Its price varies a lot because of the different insulation materials and strategies out there. Fortunately, newer homes are cheaper for insulation services because adding them to an in-construction house is a breeze.
Then comes the drywall, which is fitted onto the frame you currently have. It is taped to the frame walls and glued/taped at the seams so the imperfections between boards of drywall are not visible. The drywall is given a lick of primer paint and then left to dry. It is primarily used for interior walls that don’t need the thickness or the protection that the exterior walls of the property have.
This whole process can take two weeks, give or take a few days.
Completing Interior And Exterior Walkways
Now that the house looks more like a house, it’s time to make it look homely. To do this, you need to install the following:
All of these transform blank drywall into something more homely and lived-in. You’re building a home, not a warehouse or office block, and that means it should have most of these trimmings. It’s also an opportunity to express your style since you can get many of the items in that list in different styles.
Along with these interior trims and their finishes, you should also turn your attention to the exterior walkways of your home. By now, the site is probably a mess. Now is where you clean that up and install any paths, patios, or driveways that need to get installed. Remember that curb value is very important for real estate agents and timid house buyers. If you ever plan on selling your home, even in the distant future, you need to have a great curbside profile that invites people in.
Installing exterior fixtures isn’t easy, it can take months – much longer than any interior changes. It can cost more, though it depends on what you’re adding to the curbside view of your house.
If you have hopes of landscaping, wait until your house is done first. While similar, you can always get landscapers out to work on your home from the outside after you’ve finished building it.
This typically happens toward the end of a build because it involves pouring a lot of concrete. Concrete can get damaged by heavy machinery, so they need to have done their job and left the site before large walkways are poured.
Painting Walls And Installing Flooring
Next is the flooring, then a lick of colored paint.
Flooring varies wildly from home to home. No two places have the same flooring setup, not to mention that houses have multiple types of flooring depending on the room. It’s unusual to have carpet in a bathroom, for example, and tiles/stonework are preferred in kitchens.
There’s also vinyl and wooden flooring to consider too. What you choose is a matter of personal preference, of course, along with what you can afford and what you can feasibly install yourself if you haven’t got contractors working for you.
The drywall may have a primer coat on it but it’s not done yet. Now you need to paint over the walls inside the home again. Once again, we can’t tell you exactly what to do, since everybody prefers something different when decorating their home. This is the part where you can truly let your imagination run wild and decorate your home however you please.
If we have any advice, you should invest in a boilersuit and a roller, then get to work. Spray-painting tools can be great for exterior painting too, though you’ll want to take time to practice and make sure you have a good aim with one. You don’t want to accidentally give some rented construction equipment a new paint job.
You’ll need to get multiple colors too unless you’re planning on painting every room the exact same. If you want to go with the professional approach, create a color palette, a database of all the colors that you’re using in your home. This can make choosing paints easier and enable you to decorate your home in a way that makes sense while still expressing yourself.
When you do get round to painting, try to keep some spare. That way, you can do touch-ups and other small jobs that may come along when the construction job is done. It doesn’t take much to chip paint off of a wall, especially on a construction site, so keeping spare paint will save you time and money in the future. It can be a nightmare finding the exact same shade of color that you used three years ago.
Final Inspections
There are many different inspections involved when you are building your own home. When going on this journey, you’ll need to make sure that you’re doing it right every step of the way. If not, you’re going to run into problems later. Many of them will need expensive repairs and some of them might even be dangerous.
In a typical construction, there can be as many as five separate inspections that your project must pass. Depending on where you are and what you’re building, you may need to jump through more or fewer hoops.
If any defects are identified at this stage, follow-up inspections will probably be needed to find the root of the problem, fix it, then re-investigate the house to make sure all is in order.
For some houses built by experienced professionals, the last round of inspections can take a week! Don’t fret if there are defects, most are easily corrected if you got the basics correct.
If you worked with a contractor and haven’t had much input with the home, you will also be treated to a final walk-through. This is similar to where a real-estate agent walks the buyer through a home for sale, except you already own the place and you’re just getting to know the place.
This is typically an informal event, unlike the other inspections where everything needs to be perfect. It is, however, an inspection done by yourself where you should check everything works and bring up any concerns you have with your contractors.
If you built most of the house yourself, a walk-through is redundant since you’ll be painfully familiar with the build, its high points, and its low points. While the process of self-building can be long and arduous, it does guarantee that you get something that was built to your standards.
Hiring A Contractor
We suggest hiring a contractor, like G.H Clark, for any important aspect of the build which you are not confident in. If you are already a deck builder by trade, then completing that part of construction yourself makes sense. But if you have never attempted something of this magnitude before, hiring professionals can speed up the process and avoid costly mistakes.
Using G.H Clark Contractors as an example, the company can build fiberglass shingle roofs, flat roofs or metal roofs to match your style while still being functional. They can install vinyl, polymer shake or fiber cement slides to create beautiful country-style outward aesthetics.
They can install and replace windows with care, making custom designs if requested. And they can install energy efficient doors which help trap or release heat, lowering the cost of your energy bills. The list goes on!
Using a company like this can allow you to get the best deal while creating a home which matches your vision. You are in control and you get all the professional help you need.
Finishing Up And Conclusion
Those are the broad steps that are needed to build a house from scratch. As you can see, there are many logistical concerns before you even start, and even more waiting for you after you are finished!
It takes a lot of planning and dedication to build your own home, but it is rewarding too. You don’t just get to design your own space and use your favorite materials; you can also save some money by doing most of it yourself. Even with the most hardcore DIY builds, you’ll likely need a licensed plumber and electrician to install the dangerous systems that turn a house into a home.
Self-builds take months, during which you need to be prepared for hiccups and disruptions. Hopefully, this guide has given you valuable insight into how building a home works, so nothing should take you by surprise.[/et_pb_text][/et_pb_column] [/et_pb_row] [/et_pb_section]
Roof Gutter and Ice Dam Formation: What You Need to Know
/in Gutters/by G.H. Clark ContractorsThe sight of icicles dripping down and clinging to the edges of the roof of a house may paint an idyllic winter picture, but in reality, these are ice dams, and they can be extremely damaging to your property.
What are ice dams?
When melting snow runs down a sloped roof’s surface and refreezes, ridges of ice called “ice dams” form on the eaves.
Ice dams usually form on heated homes. In the winter, heat rises through the ceiling and into the attic, effectively warming the roof. When the roof’s temperature goes above 32°F, it’s enough to melt snow. But the roof’s edges, subject to the outside elements, remain below freezing.
As the top of the roof warms and melts snow, the snowmelt runs down the slope and reaches the cold edges, where it freezes. As the cycle continues, water can get trapped behind the growing rim of ice along the roof’s edges and create a full-fledged ice dam.
Ice dams can cause many problems, including backed-up water leaking into your house and the weight of icicles loosening roof shingles and tearing off your home’s gutters.
How do gutters contribute to ice dam formation?
The formation of icicles is inevitable in the winter. Everybody heats their homes, which will naturally heat the roof enough to melt snow. It’s what happens when the snowmelt runs down that causes destructive ice dams to form—and your gutters may be the culprit.
If you have an open gutter system, the melted snow can settle into the gutter until it fills and overflows, causing icicles to form. This is why gutter guards are important.
When water freezes, it expands, which means your gutters can crack or get some other type of damage when ice dams form. With gutter guards, you can prevent melted snow from getting into the gutter and freezing there.
Gutter guards are also important for preventing dirt buildup inside your gutter. When leaves, twigs, and other debris accumulate in your open gutter, it gets clogged, and water cannot drain properly through the downspouts.
As such, when the snow melts, the water doesn’t drain out. It just stays in the gutter until it freezes again or gets frozen over by a new deluge of snowmelt and forms an ice dam.
Apart from gutters without proper guards, another cause of ice dams are incorrectly installed gutters and guards. It’s also possible that you may have used the wrong gutter guards.
Even with proper gutter guards, if you don’t maintain your gutters regularly by cleaning them, there may still be debris inside that clogs the drain and prevents water from flowing freely down.
Protect Your Gutters and the Structure of Your Home
Here are some of the things you can do to prevent ice dams from forming and damaging your property:
G.H. Clark Contractors is a Maryland-based gutter installation company, providing an array of services to homeowners. Whether you need to install a gutter protection system or new gutters to replace your old ones damaged by ice dams, our team will get the job done.
Get a free estimate when you contact us today.
4 Signs of Clogged Gutters and How to Fix Them
/in Gutters/by G.H. Clark ContractorsGutters are your home’s primary defense against rain and water damage. When gutters start to clog and sag, they can put your home’s roof, walls, and foundation at risk.
As your gutter specialists in Maryland, we highlight common signs your gutters are clogged and need professional cleaning.
1. Water is spilling over the sides
Gutters are designed to direct runoff from rainstorms and snowmelt from your roof to a designated drainage area.
When gutters are clogged, the opposite happens. Water is forced to run over the sides of your gutters instead of flowing through them. This results in costly water-related problems such as basement flooding.
The next time it’s raining, keep an eye on where the water’s flowing. Excess water spilling over the edges is a clear sign that you need professional gutter cleaning.
2. Gutter channels begin to sag
All types of debris can settle in your gutters over time. The excess weight of dirt, sticks, leaves, twigs, pine needles and roofing materials can make gutter channels sag and pull away from your home.
Once the debris is eliminated, you may be able to reshape or re-attach the gutters to safeguard your home. In cases of severe roofing damage, you may need to replace your gutters entirely.
3. Birds and pests reside around the gutters
Clogged gutters offer a convenient and safe haven for pests, birds, rodents, insects, and other wild animals. The warmth and moisture created by decaying leaves and debris make gutters an ideal nesting spot.
Pests can spread or trigger a variety of health risks. Infectious diseases such as rabies, Lyme disease, and Zika virus can be carried by mosquitoes, rodents, and other animals.
Similarly, ants and termites are silent destroyers that can cause severe damage to the foundation of your house. They can also ruin wooden structures such as furniture and can cause ceilings and floors to collapse.
Ignoring clogs puts your home at risk for damage and pest infestation. Regular gutter maintenance can help you get rid of pests before they cause damage to your home. You can also install a gutter protection system to prevent debris from building up and attracting pests. Both solutions are a lot cheaper than hiring a pest control professional or replacing your roof completely.
4. Icicles appear during winter
Icicles can look beautiful, but they’re extremely dangerous, too. Large, falling icicles can put you at risk of broken bones and serious bruises. They can also be a sign that your gutters are clogged.
Icicles form when your gutters are blocked by debris, causing excess water to back up and settle on your roof. Icicles and ice dams in your gutters can also loosen shingles, tear off your gutters, and cause water to back up and work its way into your home.
Keep your gutters in pristine condition
For gutters to function properly, they must be kept clear of any dirt or debris buildup. At G.H. Clark, we offer professional gutter cleaning services and gutter protection systems in Maryland.
To know more about our gutter solutions, visit our showroom in Prince Frederick or contact us for a no-pressure quote today.
The Pros and Cons of Floor to Ceiling Windows
/in Windows/by G.H. Clark ContractorsAmong the most prominent design and home renovation trends of 2022 is connecting with nature. Homeowners want more natural light, choosing more oversized windows that enhance the atmosphere of an open home that connects to the outdoors. And to make the transition from the indoors to the outdoors even more seamless, one of the best options in the market is floor-to-ceiling windows.
With years of experience performing window replacements throughout Maryland, G.H. Clark Contractors has had countless homeowners bring up window walls. Many people see them as a prominent feature in many luxury real estate properties and want to mimic the effect in their own homes.
But floor-to-ceiling windows, as with any major home renovation project, are a significant investment. They will act as whole walls in one area of the living space and require oversize panes of glass. Before you decide on installing them, consider the pros and cons carefully.
Pros of Window Walls
More natural light
The primary reason you might install floor-to-ceiling windows is to allow more natural light into the home. With no wall obstruction and much more glass, sunlight can flood the room from virtually every direction.
At the same time, you save energy. More natural light means you use up less energy for indoor lighting as long as there’s still daylight outside. The best place to add window walls is an area that gets the maximum angle of sunlight through the day so you can maximize the light.
Illusion of space
Replacing the walls with windows opens up your space. Even a small room could look more spacious with floor-to-ceiling windows. For example, if you set floor-to-ceiling windows on either side of a room, not only would the room look much brighter, but it would also look more expansive.
Transitions to outdoor space
Most floor-to-ceiling windows are placed toward a garden view, lawns, or scenery. These windows are excellent for creating transitions between indoor and outdoor space, which is why they’re also frequently used to lead towards patios or decks.
Downsides of Window Walls
High cost of installation
Expect to pay more than average windows. The price range for floor-to-ceiling windows ranges from $700-$1600 per foot, without counting any framing, treatments, or specific glaze. There’s also the cost of design, extra engineering, and structural components.
Remember that these windows are stand-alone and are not anchored to a wall like average windows. They need to be structurally sound and support that section of the wall.
Lack of privacy
With large windows come ample viewing space both inside and out. People outside are more easily able to see what’s going on inside your home. There’s always the option of blinds and curtains. However, even when drawn aside, they can hinder the illusion of seamlessness from indoors to the outdoors.J
One way to resolve this is to add a special tint to the windows to allow you to look outdoors safely but prevent others from looking inside. This may add to the cost of the windows, but it’s an effective way to get privacy without interrupting the transitional space.
Heat loss
A home loses about 20%-30% of its internal heat through the windows. The larger the windows, the more heat escapes. It may end up costing you more in heating bills.
Consult with Window Replacement and Installation Specialists
Overall, floor-to-ceiling windows are often seen in luxury homes because that’s what they are—a luxury. While they have excellent benefits and are aesthetically pleasing, they come with a high price tag. However, speak to professional contractors who have had a lot of experience installing various windows. You may be able to get the same effect without the downsides.
For example, you might be able to replicate the concept with sliding glass doors or multiple fixed windows. Lift and side doors are also another option. Overall, an expert contractor would help you balance the expense and the benefits.
G.H. Clark Contractors has installed countless windows into homes and commercial properties in Maryland. We are fully certified in producing quality workmanship in window replacement and installation. Contact us today to get a free estimate, or browse our gallery for design inspiration.
Common Causes of Damage to Wooden Doors
/in Doors/by G.H. Clark ContractorsWood has been the all-time classic choice for front doors because of its strength, warmth, and durability. Most homeowners want them, and contractors have had difficulty getting lumber supplies for them, thanks to the pandemic-caused supply shortage. So, if you have a wooden door at home, you have to make sure to maintain it carefully, as there might be difficulty in getting a replacement or lumber for repairs.
G.H. Clark Contractors have performed door repairs in Maryland homes for years and have seen the different types of damage wooden doors sustain. While wood is well-known for its durability, it’s still susceptible to some damage if they’re not maintained properly. Problems could affect the door itself, the hinges, or the frame.
Some of the most common wooden door damages are easy fixes, but others may require the help of a specialist.
Common Issues With Wooden Doors
Swollen door
Wood will expand or contract depending on the temperature. If your home has recently been exposed to extremely high temperatures outdoors, your door will start to accumulate moisture and swell up in response. As a result, it’ll start to stick and become more challenging to open.
If you live in a humid area for most of the year, this will happen too. Humidity can cause a door and its frame to start warping.
Scrutinize the door and determine which area is swollen—the door itself or the frame. Check how far the swelling has gone. If the swelling is minimal, you can repair this by taking a sander and lightly plane the swollen area.
However, if the swelling is too significant, you’ll need to consult with professionals for repairs, as any attempt to fix the door may worsen the situation.
Sticking door
The door may stick or become difficult to open for various reasons. The door may not be hanging in the frame correctly due to warping, causing it to get stuck. Another typical instance happens with newer homes. As the foundations settle in the home, the door frame will no longer be in perfect placement. You might also have sagging or warped hinges damaged over time.
To fix this, you’ll need to have the door realigned to fit the door frame perfectly. In addition, you need to make sure that there are three or four hinges on the door instead to protect against warped or broken hinges.
Dull and squeaky door
Sunlight can eat at the finish of your doors over time. It’s imperative to have your door finished and sealed correctly, especially if it’s your front door. Ultraviolet light can be very damaging to wood doors. If the door’s finish comes off, the wood will receive the full brunt of UV light.
In addition, if you live somewhere where there’s plenty of wind, the wind can damage the door’s finish significantly while exacerbating existing sunlight damage. The wind also dries out your door, creating a loud squeak.
You’ll have to ensure that your door is sanded and sealed correctly to correct the damage. Restoring the protective finish of the wood can help it stay beautiful and like-new for a long time.
Call for Professional Repairs
Wood can be very challenging to repair on your own because it’s a natural material, susceptible to scratches, dings, and changes due to the environment. It’s always best to call a professional to repair your door and eliminate the wear and damage done to it. This way, you can be sure that someone with the right knowledge and tools can restore your beautiful door.
G.H. Clark Contractors have handled installation and repairs for multiple types of doors—glass, wood, metal—and different forms such as sliding doors, storm doors, front doors, and more. Contact us today to consult about your door repairs and get a free estimate. Or you can browse our door services to see if you would rather have your door replaced instead.