America is experiencing a home improvement surge, with 3 out of 4 homeowners surveyed by Porch.com completing a major project since the pandemic’s start. Despite the surge, completing a home improvement project just got even more expensive.
That means it’s more important than ever to carefully plan your next home project to avoid spending too much. If you’ve been planning to work with a roofer in Maryland to replace your old roofing, we’ve compiled some of the essential things you need to know first before you start investing.
What You Need to Consider First
For some homeowners, purchasing the same type of roof as the old one is enough. While there’s nothing inherently wrong with the idea, it may cause you to miss out on the opportunity to upgrade the functionality and look of your home’s roof.
Instead of simply relying on just an updated version of your old roof, try considering the following factors first and compare them to your old roofing system. It should help you determine which aspect of roofing was already addressed and which one you can invest in this time around.
Roof Pitch
Roof pitch is the slope of a structure’s roof. Various roof designs have different roof pitches. A house with a pyramid roof has a steep roof pitch, while commercial roofs often have a low-slope roof pitch.
Roof pitch differs based on their priorities. For example:
- Low-pitched roofs are effective in protecting structures like commercial buildings but are prone to water buildup.
- High-pitched roofs are designed to prevent water and snow buildup.
If you’re planning to update your roof, it can be an excellent opportunity to change your roof’s pitch. If your home initially has a flat or lower-slope roof, it may be possible to upgrade it to a higher pitch. That way, you can prevent any water pooling and even provide extra space in the form of an attic.
Appearance
Your roof is generally visible to everyone on the street, making it a crucial factor in your home’s curb appeal. If you’ve been unsatisfied with your old roof’s appearance, then it may be time for an update.
You can completely change the color, texture, and aesthetic of a house by simply changing the material of your roof.
However, always be true to your house’s architectural design and style. That means if you have a classic 60’s ranch house, do not use metal roofing, and if you have a Spanish-style house, never use wood shingles.
When updating the look of your roof, always choose a roofing material that will be consistent with the original design of your home.
Weather Resistance
Your roof is a large protective barrier between you and the weather outside. Your new roof must withstand extreme weather like rain and strong wind and endure the sun’s heat for years to come.
Roof materials play a huge part when it comes to weather and climate resistance. Some materials like wood are excellent for colder climates, while metal works well in hot and cold environments.
Your roof’s color tone is also vital because it contributes a lot to energy efficiency. Light-colored roofs reflect heat, so they are perfect for hotter climates. In colder regions, dark-colored roofs work best because they can absorb and retain heat.
When getting a new roof, carefully consider which material would suit your region better. If your previous roofing materials had not protected you from the elements, then it’s time to get a different one.
Durability and Longevity
If you plan on staying in your house for several years, longevity and durability are essential factors to consider. Each roofing material has its estimated lifespan. However, it’s usually the pricier ones that last longer.
If longevity is important to you, getting inexpensive material to save money can be unwise. Getting a cheap composition roofing can get the job done for a couple of years, but you’ll eventually spend more money replacing them again.
Fire Rating
Fire rating is perhaps the most overlooked roofing factor. Some homeowners install roofs without even knowing their fire rating. The Underwriter’s Laboratories (UL) generally provide the fire rating for all roofing materials and the sheathing beneath them.
Here are the fire ratings for roofs:
- Class A: Provides the best protection against fire. This is the highest standard fire rating for roofing materials. Some Class A material can still catch fire but spreads slowly. Metal roofs, fiberglass, and asphalt shingles are under this classification.
- Class B: Able to withstand moderate exposure to fire but falls short of being as fireproof as Class A materials. Fire-treated shingles and sheathing fall under this classification. It’s worth noting that some communities do not allow the installation of roofs with Class B materials.
- Class C: Resists fire damage for a short time, but it spreads quickly once the material catches fire. Plywood sheets, cedar shakes, and wood shingles are classified as Class C materials. Despite their vulnerability to fire, they are common roofing materials in most homes.
Whenever you are shopping for materials or working with your trusted roofing contractor, always ask for the fire ratings and invest in Class A materials whenever possible.
Popular Roofing Materials
Not all roofing materials are created equal. Some have certain advantages over others. Additionally, not all materials can be used on every roof. For example, a low-slope roof demands a different surface than those commonly found in roofs with a steeper pitch.
To help you distinguish between the different roofing materials, we listed the popular types below.
Asphalt
Asphalt remains the most commonly used roofing material due to its affordability and easy installation process. It’s usually made of fiberglass, asphalt, and ceramic material. Asphalt is sold in two configurations:
- Single-thickness: The standard and affordable variation of asphalt roofing.
- Laminated: A thicker and more textured variation of asphalt roofing. It does a better job of looking like wood and lasts longer than single-thickness asphalt roofing.
The average cost of asphalt roofing installation ranges from $200 to $250 per square foot. Asphalt roofing is known to last for at least 20 years.
Metal
Metal roofing is known for being extremely durable, lightweight, rot-resistant, and fireproof. Metal roofing can also reflect heat and sunlight, which makes it an excellent choice for warmer climates. However, metal roofs also do an excellent job of shedding water and snow.
Metal roofs are either:
- Steel
- Lead
- Aluminum
- Copper-and-asphalt (shingles)
Metal roofs are usually made up of panels, tiles, strips, and shingles. Metal roof installations can cost $700 or more per square foot, depending on the type. Metal roofing materials can last around 50 years.
Slate
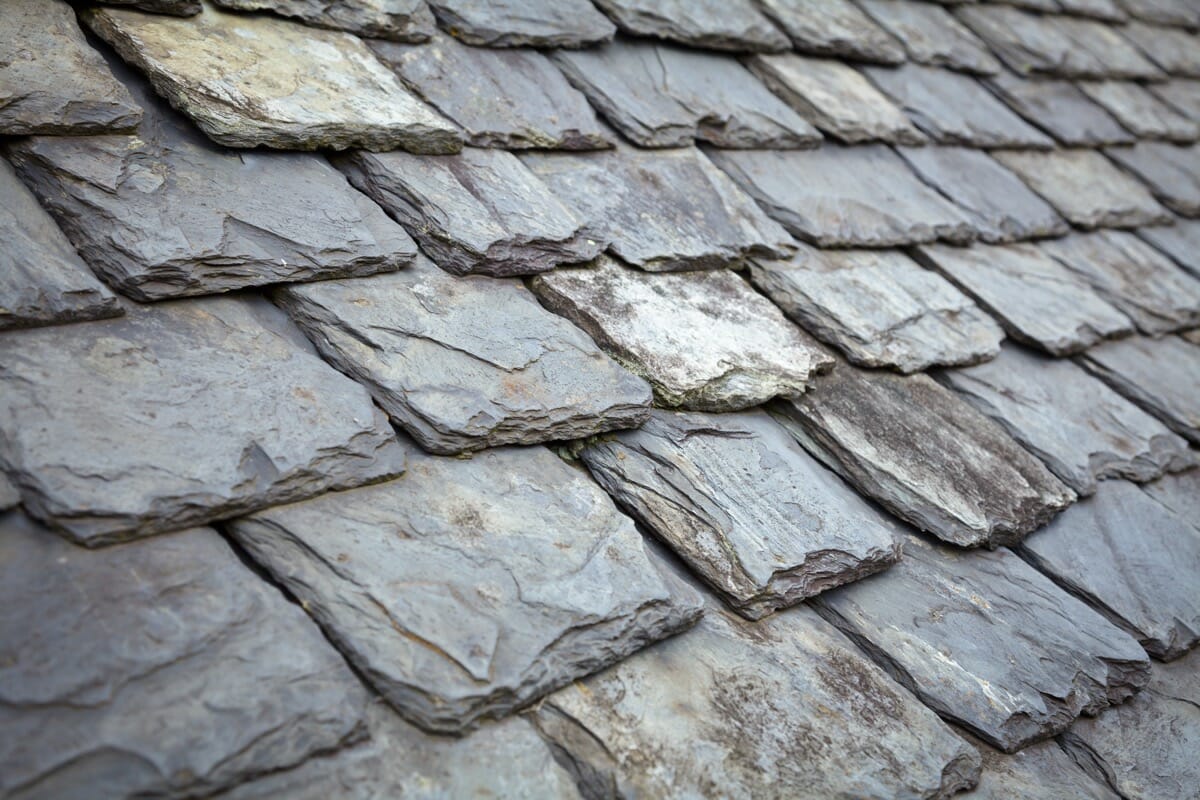
Slate roofs are known for their classic and gothic look. Slate roofing is technically indestructible even in the harshest climate and weather. This type of roofing is also fireproof, corrosion-resistant, and doesn’t rot. However, they are so heavy that most houses are not designed to handle the extra weight.
Slate can also be challenging to install, which could drive up the cost. You can expect to pay around $800 per square foot of slate roofing.
Slate is also known to outlast its fasteners and go beyond 100 years without breaking down.
Wood
Wood roofing remains a top choice for many homeowners due to its rustic aesthetic. They are lightweight and easy to install. Wood roofing is usually made of cedar, southern pine, and redwood.
Wood roofing’s biggest downside is its vulnerability to fire, with some areas actively forbidding its use. They also require regular maintenance to prevent rotting. An adequately maintained wooden roof can last up to 25 years.
The average installation cost for wooden roofing can range from $300 to $500.
How Much Will It Cost You
Nationally, an average homeowner can spend around $8,460 to have a new roof installed. Most homeowners spend $5,582 to $11,547 for roof installation, with the price heavily depending on the material used, size of the house, and location.
The cost can be broken down to about 60% labor and 40% for materials.
If you are completely redoing your roofing with a different material, it can cost you around $7,000 to $12,000 and even more, depending on the material you choose. This pricing should already include the removal of your old roof.
Keep in mind that if you plan on changing to new roofing material, you will have to pay more if your current roof framing is not designed to handle the new material. For example, if you initially have asphalt roofing, you’ll have to upgrade the frame to support something heavier like slate.
Hiring a Professional Roofer
If you are ready to hire a roofing contractor, it’s best practice to shop for quotes or estimates from at least three local contractors. It will help you get the best price for your roof replacement project.
Each estimate should be within a margin of $ 2,000 to $4,500 for the same job and area. If the estimates you got are below or beyond the price range, review your estimates and make sure all costs are accounted for.
It would help if you also kept an eye out for hidden costs before choosing a contractor. The last thing you need is more unexpected costs during the project. Watch out for the following warning signs:
- Contractors pressuring you to sign a contract immediately
- Contractors requesting a large cash deposit and entire roof replacement charge upfront
- Unclear or confusing project estimates
- Estimates that have several added outliers or expenses not present in quotes from other roofing contractors
Proper Planning Is Worth It
All the planning and preparation involved in roof replacement projects can feel overwhelming. However, all efforts will be worth it, especially if you’re able to find the perfect roofing for your home at the best possible price.
G.H. Clark Contractors, Inc. is the best choice for all your roofing installation and replacement needs. If you are looking for a reliable roofer in Maryland, get in touch with us today to get a free no-pressure estimate and to discuss your project with our team of roofing professionals.
What You Should Know Before Starting a Roofing Project
/in Roofing/by G.H. Clark ContractorsAmerica is experiencing a home improvement surge, with 3 out of 4 homeowners surveyed by Porch.com completing a major project since the pandemic’s start. Despite the surge, completing a home improvement project just got even more expensive.
That means it’s more important than ever to carefully plan your next home project to avoid spending too much. If you’ve been planning to work with a roofer in Maryland to replace your old roofing, we’ve compiled some of the essential things you need to know first before you start investing.
What You Need to Consider First
For some homeowners, purchasing the same type of roof as the old one is enough. While there’s nothing inherently wrong with the idea, it may cause you to miss out on the opportunity to upgrade the functionality and look of your home’s roof.
Instead of simply relying on just an updated version of your old roof, try considering the following factors first and compare them to your old roofing system. It should help you determine which aspect of roofing was already addressed and which one you can invest in this time around.
Roof Pitch
Roof pitch is the slope of a structure’s roof. Various roof designs have different roof pitches. A house with a pyramid roof has a steep roof pitch, while commercial roofs often have a low-slope roof pitch.
Roof pitch differs based on their priorities. For example:
If you’re planning to update your roof, it can be an excellent opportunity to change your roof’s pitch. If your home initially has a flat or lower-slope roof, it may be possible to upgrade it to a higher pitch. That way, you can prevent any water pooling and even provide extra space in the form of an attic.
Appearance
Your roof is generally visible to everyone on the street, making it a crucial factor in your home’s curb appeal. If you’ve been unsatisfied with your old roof’s appearance, then it may be time for an update.
You can completely change the color, texture, and aesthetic of a house by simply changing the material of your roof.
However, always be true to your house’s architectural design and style. That means if you have a classic 60’s ranch house, do not use metal roofing, and if you have a Spanish-style house, never use wood shingles.
When updating the look of your roof, always choose a roofing material that will be consistent with the original design of your home.
Weather Resistance
Your roof is a large protective barrier between you and the weather outside. Your new roof must withstand extreme weather like rain and strong wind and endure the sun’s heat for years to come.
Roof materials play a huge part when it comes to weather and climate resistance. Some materials like wood are excellent for colder climates, while metal works well in hot and cold environments.
Your roof’s color tone is also vital because it contributes a lot to energy efficiency. Light-colored roofs reflect heat, so they are perfect for hotter climates. In colder regions, dark-colored roofs work best because they can absorb and retain heat.
When getting a new roof, carefully consider which material would suit your region better. If your previous roofing materials had not protected you from the elements, then it’s time to get a different one.
Durability and Longevity
If you plan on staying in your house for several years, longevity and durability are essential factors to consider. Each roofing material has its estimated lifespan. However, it’s usually the pricier ones that last longer.
If longevity is important to you, getting inexpensive material to save money can be unwise. Getting a cheap composition roofing can get the job done for a couple of years, but you’ll eventually spend more money replacing them again.
Fire Rating
Fire rating is perhaps the most overlooked roofing factor. Some homeowners install roofs without even knowing their fire rating. The Underwriter’s Laboratories (UL) generally provide the fire rating for all roofing materials and the sheathing beneath them.
Here are the fire ratings for roofs:
Whenever you are shopping for materials or working with your trusted roofing contractor, always ask for the fire ratings and invest in Class A materials whenever possible.
Popular Roofing Materials
Not all roofing materials are created equal. Some have certain advantages over others. Additionally, not all materials can be used on every roof. For example, a low-slope roof demands a different surface than those commonly found in roofs with a steeper pitch.
To help you distinguish between the different roofing materials, we listed the popular types below.
Asphalt
Asphalt remains the most commonly used roofing material due to its affordability and easy installation process. It’s usually made of fiberglass, asphalt, and ceramic material. Asphalt is sold in two configurations:
The average cost of asphalt roofing installation ranges from $200 to $250 per square foot. Asphalt roofing is known to last for at least 20 years.
Metal
Metal roofing is known for being extremely durable, lightweight, rot-resistant, and fireproof. Metal roofing can also reflect heat and sunlight, which makes it an excellent choice for warmer climates. However, metal roofs also do an excellent job of shedding water and snow.
Metal roofs are either:
Metal roofs are usually made up of panels, tiles, strips, and shingles. Metal roof installations can cost $700 or more per square foot, depending on the type. Metal roofing materials can last around 50 years.
Slate
Slate roofs are known for their classic and gothic look. Slate roofing is technically indestructible even in the harshest climate and weather. This type of roofing is also fireproof, corrosion-resistant, and doesn’t rot. However, they are so heavy that most houses are not designed to handle the extra weight.
Slate can also be challenging to install, which could drive up the cost. You can expect to pay around $800 per square foot of slate roofing.
Slate is also known to outlast its fasteners and go beyond 100 years without breaking down.
Wood
Wood roofing remains a top choice for many homeowners due to its rustic aesthetic. They are lightweight and easy to install. Wood roofing is usually made of cedar, southern pine, and redwood.
Wood roofing’s biggest downside is its vulnerability to fire, with some areas actively forbidding its use. They also require regular maintenance to prevent rotting. An adequately maintained wooden roof can last up to 25 years.
The average installation cost for wooden roofing can range from $300 to $500.
How Much Will It Cost You
Nationally, an average homeowner can spend around $8,460 to have a new roof installed. Most homeowners spend $5,582 to $11,547 for roof installation, with the price heavily depending on the material used, size of the house, and location.
The cost can be broken down to about 60% labor and 40% for materials.
If you are completely redoing your roofing with a different material, it can cost you around $7,000 to $12,000 and even more, depending on the material you choose. This pricing should already include the removal of your old roof.
Keep in mind that if you plan on changing to new roofing material, you will have to pay more if your current roof framing is not designed to handle the new material. For example, if you initially have asphalt roofing, you’ll have to upgrade the frame to support something heavier like slate.
Hiring a Professional Roofer
If you are ready to hire a roofing contractor, it’s best practice to shop for quotes or estimates from at least three local contractors. It will help you get the best price for your roof replacement project.
Each estimate should be within a margin of $ 2,000 to $4,500 for the same job and area. If the estimates you got are below or beyond the price range, review your estimates and make sure all costs are accounted for.
It would help if you also kept an eye out for hidden costs before choosing a contractor. The last thing you need is more unexpected costs during the project. Watch out for the following warning signs:
Proper Planning Is Worth It
All the planning and preparation involved in roof replacement projects can feel overwhelming. However, all efforts will be worth it, especially if you’re able to find the perfect roofing for your home at the best possible price.
G.H. Clark Contractors, Inc. is the best choice for all your roofing installation and replacement needs. If you are looking for a reliable roofer in Maryland, get in touch with us today to get a free no-pressure estimate and to discuss your project with our team of roofing professionals.
Your Brief Guide to Gutter Maintenance and Cleaning
/in Gutters/by G.H. Clark ContractorsMore consumers are relying on gutter protection products to help them with gutter maintenance and cleaning. While products like gutter guards are considered helpful, it’s worth noting that they will not eliminate the need to clean your gutters.
Sooner or later, you’ll have to check and clean your gutter system so it can continue to function well. If you recently installed a rain gutter or are planning to get gutter protection in Maryland, here’s a brief guide on how you can properly maintain and clean them.
Why Cleaning Your Gutter is Important
A gutter system prevents rainwater from building up on your roof. Having a dirty or inefficient gutter can cause water to seep through your roof, walls, landscape, and even the foundation of your house.
Gutter protection systems help reduce the number of times you have to clean your gutters, but they, too, will eventually get clogged. That is why you should always get your gutters cleaned at least twice a year.
Here are some other reasons you should always get your gutter cleaned.
Water Damage
Water buildup can cause untold damage to your home over time. Even slight water stagnation can seep through the building structure and weaken it. Clogged gutters are usually the cause of leakage and ice dams if your roof has shingles.
Your house’s foundation can also suffer due to water buildup. If water overflowing from the roof spills over to the ground, it seeps down to the foundation and weakens it. Over time, the foundation will start showing cracks and become a threat to the entire structure of your house.
Breeding Ground for Pests
Clogged and poorly maintained gutters make the perfect home for various pests like:
If left to their own devices, these pests will eventually make your gutters their breeding ground and continue to torment you or your family. They can also bring diseases, especially mosquitoes.
Dirty and water-soaked gutters may cause your roof’s fascia boards to rot quickly. When these boards weaken and decay, they provide pests with direct access to your home.
Shorter Lifespan and Higher Expense
Not all gutters and gutter protection products are equal. Some, like foam guards, can quickly rot, while metallic gutters can easily corrode and rust. Depending on the type of gutter protection you have, the lack of maintenance can significantly shorten your gutter’s lifespan.
Structural water damage, roof repairs, and seepage caused by clogged gutters can also lead to expensive repairs. For example, the average cost of water damage repair may reach $3,000, while roof repair can net you around $900.
Clogged and dirty gutters are financial time bombs that can be prevented simply through routine maintenance.
Professional Gutter Cleaning Services
One of the easiest ways to clean your home’s rain gutters is by hiring a professional gutter cleaning service. Hiring professional cleaners is perfect for those who do not have the proper tools and staff to carry out the maintenance tasks.
Here are some other benefits of working with gutter cleaning professionals:
Hiring professionals can cost anywhere from $75 to $350. Nationwide, the average price is $150, but it depends on the extent and nature of the job. Pricing is generally calculated by square feet or linear feet.
Most gutter cleaning service prices can run from $0.50 to $1.50 per linear foot. You can measure the house’s perimeter to get a rough idea of how many linear feet your home has and how much it will cost you.
Price Considerations When Hiring Professional Gutter Cleaners
While there’s generally an average price for getting your gutters professionally cleaned, several factors affect the price. Your roof’s height and size are two of them.
If your home is a 2- or 3-story structure, the gutter cleaning company may need to use tall ladders and specialized safety equipment like harnesses to get the job done. It will cost significantly higher compared to single-level homes.
Houses close to pine and evergreen trees may also be a little expensive than homes further away from the foliage. That’s because some companies charge higher depending on how hard it is to remove leaves, needles, branches, and other debris from gutters.
The presence of gutter guards is also a factor. If the gutter protection system did its job, it would be easier for the cleaners to remove the debris. It can help you avoid any additional fees.
However, if the gutter guards are damaged and make it harder for the cleaning company to remove debris, you can expect to pay more for the service.
Getting bids is the best way to know how much you might pay for having your gutters cleaned. It’s common to get estimates from at least two or three companies, compare the prices, and choose which one can get the job at the right price.
Properly Cleaning Cleaning Gutters Yourself
It may be easier to get your gutters cleaned by professionals, but it’s not impossible to do it on your own. You’ll need to be familiar with specific tools, though, and be healthy enough to do some climbing.
Check out the following gutter maintenance guide to help you clean your gutters safely and successfully.
Always Keep Ladder Safety in Mind
Over 500,000 people fall from ladders every year, and 97% of them happen at home. Never underestimate the dangers posed by a simple ladder. On single-story houses, most ladders are generally 14 feet above the ground. Any additional story or level after that is another 14 feet, which is a very precarious height to work in.
When working on ladders, keep the following best practices in mind:
Use Protective Gear
Apart from using a ladder correctly, wearing the right protective gear will keep you safe as you clean. Consider using shoes with rubber non-slip soles to provide enough grip, especially if you need to climb onto the roof.
Use gloves for extra grip on the rungs and protection against debris. Latex-coated cloth gloves are a favorite among professionals because they can provide safety and grip without sacrificing mobility.
Consider wearing some form of eye protection as well. It should prevent any debris from entering or falling into your eyes and help you prevent falls by preserving your vision.
Cleaning the Gutters
Cleaning your rain gutters requires two things: a long garden hose and a gutter scoop. Using these two tools, you should be able to clean and remove most types of debris. It’s also possible to buy a cleaning solution for gutters, but you can make one by mixing equal parts of chlorine bleach and water.
Gutter Maintenance Is Worth the Effort
Maintaining and cleaning your rain gutters can be a challenge, but you are never without options. With the right gear and mindset, it’s possible to clear the gutters yourself. But the best—and safest—option is still to work with professionals. With a bit of commitment and care, you can help your gutters perform better and continue their job of protecting the integrity of your home.
G.H. Clark Contractors offers professional gutter-related services like installation, repair, replacement, gutter protection, and cleaning. If you are looking for a company to help you clean your gutters, contact us today for a free, no-pressure estimate. Our experts are more than ready to look into your concern.
Vinyl Siding 101: Answers to Essential Questions
/in Siding/by G.H. Clark ContractorsVinyl siding has been the top choice for new homes for over 25 years. In 2018 alone, around 26% of the 840,000 constructed single-family homes chose vinyl. It’s not surprising, considering the material’s affordability, easy installation, and simple maintenance requirement.
If you plan to put vinyl siding on your new home in Annapolis, Maryland, this article will help answer some essential questions you may have about the material.
Is vinyl siding a worthwhile investment?
Vinyl has one of the highest returns on investment (80%) among all types of siding materials. Even if you’re not planning to sell your home in the future, having vinyl siding in your home already provides a host of benefits.
Durable and Low-Maintenance
Among all the siding materials available, vinyl is the easiest to maintain. Vinyl doesn’t require frequent upkeep to keep it looking new. Once the siding is installed, all you have to do is clean it at least once a year.
Vinyl siding also withstands extreme weather conditions like strong winds and hail. It’s resistant to the following:
Most vinyl siding installations come with a lifetime warranty to help back up manufacturers’ claims regarding quality.
Cost-Effective
Cost is one of the reasons vinyl siding is popular among homeowners. It’s far more affordable than wood or brick siding. Installation fees are lower because of the easy process, and you don’t have to worry about additional repair and maintenance expenses.
For example, wood siding costs $8 per square foot, while vinyl siding costs $3.80. Although wood is not that expensive, it is prone to all kinds of damage in the long run. It requires regular maintenance and repairs, which adds to your overall investment in the material.
With vinyl siding, you are less likely to pay for these additional expenses.
Energy Saving
Insulated vinyl siding makes a home energy-efficient by preventing heat loss using a process called thermal bridging. Thermal bridging turns your vinyl siding into one big blanket that prevents any temperature leak from passing through the house walls.
As a result, your home remains cool during summer and warm during winter. Since your heater or air conditioner isn’t working hard to maintain indoor temperature, you can expect a significant drop in your monthly heating and cooling bills.
Versatile
One advantage of vinyl is that it can look like other types of siding. There are vinyl options that appear like cedar or stone. Vinyl siding is also available in various colors, profiles, and textures that fit any home architecture. It opens up many home design possibilities while maintaining its affordability.
Doesn’t Need Paint
Vinyl siding is perfect for homeowners who loathe the idea of painting their house’s exteriors regularly. Vinyl siding is unique because its design and color are already baked in.
Also, the siding’s color is 100% homogeneous. That means the color goes all the way through. Any mechanical abrasions or scratches will not obliterate its color.
Easy to Install
Unlike other types of siding, vinyl is light and easy to install. It comes with pre-drilled holes that allow the homeowner or contractor to fit the vinyl into the studs without a sweat. It’s even possible for someone with decent experience in homebuilding to install the siding on their own.
However, the installation stage is critical in the siding process, so a professional home builder or home improvement contractor is the best person for the job.
How Much Does It Cost to Install Vinyl Siding?
The average charge of installing vinyl siding on a single-story, 1,500 sq. ft house ranges from $4,500 to $18,000. Keep in mind that prices vary depending on the following factors:
The average labor cost is from $2.15 to $5.25 per square foot. That means installing vinyl siding in a 1,200 square feet property can net you around $2,580 to $6,300 in labor alone.
As for the replacement material, 200 square feet of vinyl siding can cost around $1,600. It’s also possible to purchase a box of simple vinyl siding containing 200 square feet for around $400.
Installation Cost by Type
Installation costs also vary depending on the type of vinyl you choose. Here are some of the popular types of vinyl siding and their associated costs:
Insulated Vinyl
It’s specifically designed to be energy-efficient. Its specialized material makes it more expensive than other types of vinyl siding.
Average cost: $8 per square foot
Average installation (materials and labor): $4 to $12 per square foot
Vinyl Shake Siding
This type of vinyl mimics the look, feel, and texture of many wooden sidings like cedar.
Average cost: $6.50 per square foot
Average installation (materials and labor): $3 to $10 per square foot
Vinyl Log Siding
This siding perfectly mimics logs like those found in wooden cabins. Most vinyl log sidings are manufactured to look like cedar logs.
Average cost: $4 per square foot
Average installation (materials and labor): $3 to $5 per square foot
Vertical Vinyl Siding
This siding is designed to look and feel like wood. Vertical vinyl is also very durable.
Average cost: $5.50 per square foot
Average installation (materials and labor): $3 to $8 per square foot
How Do You Choose the Best Vinyl Siding?
Vinyl in its basic form is a good material, but it would help to spot the right vinyl siding for your project. Here are some helpful tips while shopping for vinyl siding.
What to Consider During Installation
While it’s easy to have vinyl siding installed, crucial factors need to be considered to ensure a smooth installation for your siding. For example, the temperature can cause even the most expensive type of siding to expand and contract. It could cause the siding to buckle and warp if installed incorrectly.
Experienced siding contractors should already know the necessary steps to prevent these kinds of issues from happening. That’s why it’s always recommended to work with a trusted contractor for your new or replacement siding installation.
Apart from written estimates, it’s also best to discuss the following details with your chosen contractor to help you get the most out of the installation process:
Get Professional Vinyl Siding Installation from G.H. Clark
Vinyl is an excellent siding that provides homeowners with several advantages without breaking the bank. This article has given enough information and tips to make you invest confidently in vinyl. Consulting your contractor is a good idea to learn from the perspective of professionals.
G.H. Clark Contractors, Inc. provides professional home improvement services like siding, roofing, and gutter installation. If you are interested in having vinyl sidings installed, contact us today to request a free estimate or leave a question about our siding services.
A Brief Guide to Choosing Energy-Efficient Windows for Your Home
/in Windows/by G.H. Clark ContractorsAccording to the Department of Energy, an estimated 10-25% of household heating and cooling bills are lost through window leaks. Choosing to install the right windows will help you cut back on these leaks and reduce utility costs.
For many energy-conscious homeowners, installing energy-efficient windows is an excellent investment. Energy-efficient windows are designed to provide all the benefits of traditional windows but with the bonus of helping you save more energy.
If saving energy and money is the focus of your next window replacement project in Maryland, this brief guide will help you plan for your energy-efficient windows.
What are Energy Efficient Windows?
Energy-efficient windows look like your average window, but they are specifically designed to prevent hot and cold air from leaking out of your home. They improve insulation, lower your energy usage, and reduce your utility bills.
Like most windows, energy-efficient versions are made of glass, but their special coating makes them unique. This coating reflects UV rays, preventing the latter from entering and warming your home.
Energy-efficient windows usually have two or three panes of glass that reduce UV transmission further. Some designs also have spaces between panes filled with gasses like Krypton and Argon, which thwart energy transfer.
In addition, energy-efficient windows have long-lasting, high-efficiency sashes that stop air from leaking out of the house.
Factors that Influence Energy Efficiency
Several factors affect the efficiency and quality of an energy-efficient window. When you’re looking for energy-efficient replacement windows, keep the following factors in mind:
1. Window Frames
The type and condition of a window frame affect the overall thermal performance of the window. Old or damaged frames usually have air leaks that may affect the temperature of the house.
For example, if hot air frequently leaks through a damaged window frame during winter, your heater would have to work overtime to keep up with the loss in temperature. It will eventually raise your energy usage and bills.
While every energy-efficient window has specialized frames, the material you get distinguishes the advantages (or disadvantages) you’ll get. Here are some of the popular window frame materials:
2. Energy-Saving Glass
The type, style, and thickness of glass contribute a lot to your window’s energy efficiency. That’s because the glass allows solar rays to enter or leave your home. The glass’s heat conductivity also has an impact on energy efficiency.
When it comes to energy-efficient windows, these are the common glass types and configurations available:
3. Window Types According to Operation
Apart from the different kinds of frame material and glass, the manner of operation contributes to a window’s energy efficiency. Here are some window operating types worth considering:
Energy Efficiency Labels You Should Look Out For
When shopping for energy-efficient windows, it’s important to look for their energy rating and certifications. This information is generally found on stickers bearing the ENERGY STAR and National Fenestration Rating Council (NFRC) stickers.
1. ENERGY STAR
ENERGY STAR is an official government program that provides energy-efficiency certifications for windows, doors, and home appliances. Every ENERGY STAR sticker includes an official rating and information about how much money or energy you’ll be saving while using the product.
Some ratings can also tell you which state or region the window is certified to do better. The sticker provides specific energy performance ratings to look for in your climate.
2. NFRC Performance Label
Unlike the ENERGY STAR sticker, The National Fenestration Rating Council (NFRC) label provides more specific details regarding your prospective window’s energy performance so you can easily compare it to other products.
The NFRC window rating is also a great way to determine its “whole unit” energy performance and not just the quality of the glass. Door and window manufacturers have to pass the strict NFRC requirements before earning the label.
How Much Does Energy Efficient Windows Cost?
The average cost of an energy-efficient window is $555. However, the actual cost will still depend on the brand, frame, window type, and specific energy feature it offers.
For example, an energy-efficient window with an ENERGY STAR rating can go as low as $325 for a single-hung vinyl window. Meanwhile, a large casement window with wooden framing can cost you around $825, including installation.
The number of panes the windows have can also affect the overall cost. Here are some estimated prices for double and triple pane windows:
You can expect to pay around $50 to $100 per window installation for new construction.
Bottom Line
An adequately installed energy-efficient window can help you save $126 to $465 a year by simply replacing old single-pane windows. For homeowners looking for ways to save money, getting energy-efficient windows can be an excellent long-term investment.
This guide should help make your search for the right energy-efficient window easier. Of course, it’s best to reach out to your trusted contractor to help you determine the perfect energy-efficient window for your home.
G.H. Clark Contractors, Inc. offers reliable window replacement and installation services in Maryland. If you plan on having your windows replaced, contact us today to discuss your project and get a free estimate.
Common Door Issues and How to Fix Them
/in Doors/by G.H. Clark ContractorsDoors don’t just keep you safe from unwanted visitors; these also play a vital role in your home’s energy efficiency. But after having their doors installed during home construction, most homeowners forget all about them—at least, until they break down or get chipped.
Like all other features of your home, doors are prone to problems that, if left ignored, can be a security risk or a contributory factor to your rising electricity bills. Before calling your trusted door installation service here in Maryland, check if you can do a quick fix. This article gives suggestions on how to address some of these problems.
Issues with the Door Hinge
One of the most common door issues can be traced to its hinges. Some of the signs of door hinge problems include:
The best solution is to lubricate the hinge using products like WD-40, soap, and olive oil. The lubricant should immediately solve the squeaking noise and help you open and close the door smoothly.
Meanwhile, loud, rattling noises are often caused by loose hinges. Inspect your door’s hinges and tighten them up.
If any of these fixes do not work, the hinges may be too far gone and need to be replaced entirely.
Door Doesn’t Latch
When your door refuses to latch, this is usually due to a problem in the strike plate mechanism. The first thing you need to do is observe how the latch hits the plate. If you can’t do this because of the angle of the door, coat the latch with lipstick. Once you close the door and open it, the exact location where the latch is hitting will be marked by the lipstick.
Once you determine where the latch is grazing the strike plate, you can adjust the plate’s position. Move the strike plate to the location where the door would latch on properly.
Door Draft
If you’ve been noticing a cold draft coming from your door, an air leak might be present. The door’s original weatherstripping has finally worn out. Drafty doors need to be fixed as soon as possible, especially during the summer and winter seasons. This is to avoid having your heating and cooling systems work harder to warm or cool the room.
The first thing you can do is replace the old weatherstripping. Weatherstripping reseals your doors, so it remains energy efficient. It’s easy to apply, and the materials you need should be available in your local hardware store.
In some cases, it might not be the weatherstripping causing the problem; the door might have been installed incorrectly. In this case, you will have to rehang the door and readjust the entire thing against the frame. If this is what you need to do, it would be best to get in touch with a professional to help you readjust your door.
Over time, you may find yourself experiencing these door problems. Most door issues can be quickly resolved even with minimum tools and experience, but some require a home contractor to inspect and fix them. Routine checks and maintenance should help prevent your doors from breaking down anytime soon.
G.H. Clark Contractors, Inc. offers a wide variety of doors for your personal preference and replacement services. If you are interested in having a door installed, contact us today for a free estimate. Our team will also answer any questions you have regarding our services.
Common Culprits of Energy Leaks in Your Home
/in Roofing/by G.H. Clark ContractorsIf you’ve noticed that your energy bills are suspiciously high, despite having energy-efficient HVAC systems and appliances, then some parts of the home may be the culprit. Warm air may enter or exit your house through sneaky leaks and cause your HVAC system to work harder. Your energy bills climb quietly.
To find the source of the leak, check these common problem areas:
Doors
How do you know if warm air leaks through your doors? Here are a few ways to inspect:
The older the door model, the higher the chance that it leaks because of the combination of outdated insulation features and wear and tear.
You may seal the leaks on the door through caulking or weatherstripping. In some cases, however, it’s much more cost-effective to replace a door rather than make repairs. Newer, high-performance doors guarantee better energy efficiency and are less likely to need repairs.
Windows
Windows are one of the biggest culprits behind energy loss. In fact, the U.S. Department of Energy states that the heat loss and heat gain through windows are responsible for up to 30% of heating and cooling energy use in the home.
Just like with doors, warm air escapes or enters the home through the small cracks and gaps in the window. If every window in your home leaks, the amount adds up to an expensive energy bill.
Here are a few ways to improve the energy efficiency of your existing windows:
In some cases, it may be more cost-efficient to replace your windows. Newer models have more air-tight features and are less likely to cause problems.
Roof
Even if you have dependable attic insulation installed properly by licensed technicians, you still contend with one factor that carries a risk of roof leaks: the gutter.
If the water in the gutter doesn’t drain properly, it finds an easier way out. The water may saturate the roof and eventually leak through the insulation. Constant exposure to moisture may be detrimental to insulation. Over time, it hampers the insulation’s function, lets warm air escape or enter, and increases the home’s cooling or heating load. In consequence, your energy bills soar.
Energy leaks are not the only domino effect that a clogged gutter causes. If water doesn’t drain, it seeps through the joints and causes water damage to your walls and the foundation of the home.
Stop these problems at the source with our G.H. Clark’s gutter protection systems in Maryland. These prevent your gutters from being clogged and protect your roof and insulation from water damage.
Make sure no part of your home will cause expensive energy leaks. Get in touch with our team for gutter protection systems or other home improvement services today.
[/et_pb_text][/et_pb_column][/et_pb_row][/et_pb_section]Deck Maintenance for the Winter Months
/in Decks/by G.H. Clark ContractorsWood decks require a bit more attention during the winter season. Debris, like leaves and branches, could cause standing water, which wreaks havoc on your deck. The outdoor plants and furniture may also sustain damage from the cold temperatures.
Here’s how you can maintain a beautiful and structurally sound deck this coming winter.
Provide the Needed Repairs
If moisture finds its way into the cracks and gaps in your wooden deck, it may freeze. Water expands as it freezes, so it could split your wood and undermine the deck’s structural integrity. Over a few months, the frozen water in the nooks and crannies of the deck may cause severe damage, leading to costly repairs.
Our deck builders in Southern Maryland recommend fixing and sealing any cracks in your wooden deck before the winter season comes. It ensures that no crevice would hold ice that might damage the wood.
Clean the Deck
Once the needed repairs are addressed, give the deck a good sweep and have it power-washed. Doing so blasts dirt and grime away from the cracks and crevices. Additionally, it restores the deck to its pristine appearance.
If the stain or finish of the wood is fading, consider applying a fresh coat. The stain or finish binds with the fibers of the deck and helps protect them from weather elements. Staining or refinishing the deck also reduces the risk of mold growth. Moreover, it restores the pristine appearance of the deck. Come spring, your deck will look good as new.
Remove Plants and Furniture
Clear the deck of planters and furniture and store them indoors during the winter.
When you leave plants on the deck, they collect water from the rain and snow, which leaks under the planter. As a result, the plants may leave rings and imprints on the deck. Worse, it may lead to patches of mold growth and cause damage to the wood.
The same goes for furniture. Water may accumulate under the tables and chairs, which may cause mold and mildew. Instead of covering the furniture, store them indoors.
Clean the Deck Properly
Once the snow falls, clean the deck regularly.
Use the proper shovel. Don’t use metal shovels because they dent and chip the wood. Not only will they cause unsightly blemishes, but these chips and dents could also harbor moisture and lead to rot. Use rubber, plastic, or silicone shovels.
Don’t use salt. Many homeowners use salt to clear the snow on the decks. However, salt absorbs a huge amount of moisture, which interferes with the natural contraction and expansion of the wood. This may leave the deck more vulnerable to decay.
Go with the grain. Shovel or sweep with the grain because these motions are less likely to damage the deck.
Decks require special maintenance, but the effort is worth it — they are a lovely addition to any home. If you like to improve your deck or know someone looking to have a nice outdoor space, get in touch with G.H. Clark Contractors today.
Four Signs Your Old Windows Need Replacing
/in Windows/by G.H. Clark ContractorsAccording to the real estate website ISoldMyHouse.com, by spending around $10,000 on vinyl window replacements, you can expect an 85% return on your investment. This makes window replacement one of the best home improvements you can make.
Even if you’re not planning on selling your house, having a great set of windows can lighten up your home, help you save on utility bills, and drastically increase curb appeal. If you’re still unsure if it’s time to get new windows, then this article will list down some signs you need window replacement services in Maryland.
Drafty Window
Have you noticed feeling a slight breeze or whistling sound coming from the window? If your answer is yes, then your window may have air leaks. A great way to test it out is by holding a piece of tissue by the window on windy days to see if it quivers. If it does, you may need to have your windows replaced.
Drafty windows can be tricky during the winter months because cold air is blown into your home. This will force your heater to work overtime to cope with the temperature and eventually increase to a significant increase in utility bills.
Rising Energy Costs
One of the first signs of a house with faulty windows is a spike in energy costs. Because of a faulty or drafty window, your heating system will be working overtime during the winter. Your air conditioning will also do the same during the warmer months. Eventually, you’ll start noticing your energy bills shooting up.
Windows are your home’s most important insulation system. Installing the right windows can significantly lower your energy bills. Simply replacing your current windows with energy-efficient single-pane windows can already help save you $101 to $583 per year.
There’s Outdoor Noise
A well-insulated and sealed window can block most of the outside noise from entering your home. If you start hearing outside traffic, your neighbor’s conversations, and barking dogs in what was once a quiet room, then it’s a sign that your windows may be compromised.
Outdoor noise could also signify significant air leaks in your windows that sound quickly travels through. If you prefer some peace and quiet in your room, consider replacing the window with sound-resistant ones. Sound-resistant windows are not soundproof, but they can block most traces of sounds from the outside.
Signs of Condensation and Moisture Build-Up
When warm, moist air from your home meets with the cold glass of your window, condensation happens, and it will start fogging up. In most cases, this isn’t a significant problem. Condensation on the window’s exterior is a sign of an efficient window.
If there’s regular condensation on your window even during normal weather, then that’s a sign of a compromised window. If the glass on the wind is cold to the tough, that means it’s no longer doing a great job of insulating your home.
You may also notice moisture build-up in between the panes of a double-glazed window. This means the air-tight seal intended to reduce heat transfer is already broken. At this point, you’ll need to have your windows replaced to keep your home insulated and your utility bills low.
Windows contribute a lot to your day-to-day life. Just like everything else, you’ll eventually have to replace them with something better. If you start noticing any of these signs, it’s best to have a professional check your windows to see how you can get them replaced.
G.H. Clark Contractors, Inc. is your best choice when it comes to all your exterior, including windows replacement services. If you plan on having your windows replaced, contact us today for a free estimate or if you have any questions about our services.
Picture Window Installation: Here’s What You Need to Know
/in Windows/by G.H. Clark ContractorsReplacing your old windows is an affordable and relatively hassle-free way to boost your home’s value. Even though you don’t plan to sell or rent out your house, new windows can breathe new life into your home.
In properties with gorgeous views, many homeowners prefer installing a picture window to maximize these views. The large, fixed window design perfectly connects the indoor living space and the beautiful outside surroundings.
If you’re keen on having a picture window installed to upgrade your home, this article shares essential tips.
Picture Window Sizes
Picture windows are designed to be large windows with a pane of clear glass that isn’t broken up by a crossed frame. The standard height of a picture window ranges from 1 ft to 8ft. Picture windows also come in the following widths: 2, 3, 4, 6, and 8 ft.
A large picture window can reach 72 inches (6 ft) in both height and width. If you plan to get something bigger, you need to consult your trusted contractor to discuss the custom sizes available and how much they would cost.
Popular Picture Window Types
Picture windows vary according to the materials. Some of the popular ones are:
A major factor that impacts the cost is the pane. The price varies based on its level of energy efficiency.
Picture Window Costs
Picture windows may cost $65 to $700 depending on the size, material, and labor involved. On average, homeowners pay around $350 for a 3 ft x 4 ft vinyl picture window with a single glass pane and a standard pane.
The most significant expense associated with installing a picture window is the frame material. Here are the average costs of each frame material:
Apart from the material, another major factor that impacts the cost is the pane. The price usually varies based on the pane’s level of energy efficiency. Here are the average costs of some popular panes.
Price range: $175 to $425
Price range: $200 to $650
Price range: $400 to $875
Price range: $400 to $875
Price range: $375 to $850
Picture windows provide an amazing way to admire the beauty of nature from inside the house and brighten up any room. Having a picture window installed can reap rewards for your home and your mental wellbeing.
G.H. Clark Contractors offers window replacement in Annapolis, MD. We help you find the perfect windows for your home and install them.
If you’re opting for a picture window installation, contact us today to get a free estimate. Our team of experts will help you decide the best size, style, and material for your windows.
What You Need To Know Before Installing A Storm Door
/in Doors/by G.H. Clark ContractorsInstalling a storm door ensures preparedness for sudden shifts in weather. Are you thinking of installing one for your house? This article will be helpful.
Contrary to its name, storms doors aren’t just used during a storm.
What is the Purpose of a Storm Door?
Storm doors are designed to be an “additional” door built over an exterior door. They are added as an extra layer of protection, especially during bad weather. However, storm doors offer more than just protection.
A storm door also offers the following:
Contrary to its name, a storm door isn’t used only during a storm. This kind of door addition can be used all year regardless of the season.
What Are the Different Types of Storm Doors?
Storm doors come in different types and materials. When it comes to materials, storm doors are usually made of:
Steel-Clad
This kind of storm door is durable, rugged, and long-lasting. It can withstand the physical impact caused by bad weather or an active household.
Vinyl-Clad
This storm door type is generally inexpensive and can resist extreme temperatures, heavy rains, and snow. Vinyl-clad storm doors tend to fade over time, especially those that are constantly exposed to sunlight. It is recommended to choose fade-resistant colors like almond or white.
Wood-Core
This type of storm door has a wooden frame surrounding other components made of vinyl, steel, or aluminum. It’s the most affordable storm door option, but it requires constant maintenance due to the wood. It’s also not as sturdy as the other materials.
Aluminum
This kind of storm door is sturdy and lightweight. It’s the most popular type of material in the market. It also comes in a wide variety of colors like taupe, cranberry, brown, and black storm doors.
Storm doors also come in a variety of styles and designs. The popular options available are:
Full-view
This type of storm door has a narrow frame and a smooth glass panel, allowing ample light to enter the house when the exterior door is opened. This type also has screen panels that can be switched out when needed. Full view storm doors can cost $150 to $500.
High-view
This storm door is a solid single-panel door with glass positioned at the top for privacy. It’s also possible to install pet doors on this type of storm door. The average cost of a high-view storm door ranges from $100 to $200.
Mid-view
This type of storm door has a divided panel that covers most of its surface. The bottom section can have a pet door installed. A mid-view storm door can cost $100 to $200.
Low-E Full View
This storm door’s surface is considered low emissivity or Low-E, which reflects, absorbs, and transmits heat. This storm door is the most energy-efficient option, provides stronger insulation, and prevents fading. The average cost of Low-E storm doors ranges from $200 to $550.
What Should You Do Before Installing A Storm Door?
Before you purchase and install your preferred storm door, there are certain things you have to consider first, such as:
Inspecting your exterior door
Installing storm doors means attaching them to the exterior door. Make sure the exterior door is sturdy enough to support the storm door. If you notice any dry rots or splits on the exterior doors, it’s best to address those issues first.
Take measurements
Make careful measurements of the height and width of the exterior door’s frame. The measurements will help you determine the correct size to purchase. Measure the width at the top, bottom, and center of the exterior door. Make sure to include how your exterior door opens and closes.
It’s also worth noting that storm doors can be installed on your own. If you have the experience and the tools, you can install the storm door yourself. Opting for a professional installation is also a good idea since you’ll be sure that the storm door is installed correctly. Professional installation usually costs $70 to $200.
Installing storm doors in your home can provide you with several advantages like added door protection and functionality. By understanding the basics of storm door installations, you should make an informed decision during purchase.
G.H. Clark Contractors, Inc. offers expert contractor services, including storm door installation. Our company offers a wide variety of doors with competitive priced and welcomed price plans.
If you are planning on installing a storm door for your home, contact us today! Our team experts can answer your questions and provide a no-pressure estimate.[/et_pb_text][/et_pb_column] [/et_pb_row] [/et_pb_section]